
Dish Goodbye: 0333 220 2436 | [email protected]. Could a fresh coat of paint make an old satellite dish stand out even more? Removing satellite dish before painting gives you a clearer surface to work with, but taking down the dish is only part of the job. Brackets, fixings and redundant cables can leave holes or damage masonry if they’re removed carelessly.
It’s worth checking the surface beneath the dish before the painter starts. Poorly smoothed repairs can show through paint, while open fixing holes may let water in. Planning the removal and checking the wall first can help avoid a last-minute patch-up.
This guide explains the right order of work, what else to consider removing, and how to assess brickwork or render before painting. It also covers when height, difficult fixings or repair needs make professional removal a sensible option. Dish Goodbye removes dishes, brackets, fixings and redundant cabling across the UK, and fills and smooths the holes left by previous installations. Painting and any further surface preparation are separate steps. To ask about removal, call Dish Goodbye on 0333 220 2436 or email [email protected].
Key Takeaways
- Plan removing satellite dish before painting so the dish and its fixings don’t interrupt a smooth, continuous finish.
- Check access, cable routes and the wall’s condition before deciding how removal should be handled.
- Compare DIY and professional help based on access, fixings and repair needs. Choose an approach you can carry out safely.
- After removal, inspect the exposed surface and identify any further preparation needed before painting.
- Dish Goodbye removes redundant dishes, brackets, fixings and cabling across the UK, and fills and smooths the holes left by previous installations.
Why remove a satellite dish before painting the exterior?
Remove a redundant dish before painting if it, its brackets or its fixings obstruct the area. Painting around them can make it difficult to reach the wall evenly, while visible cable runs can interrupt an otherwise continuous finish. The dish is only one part of the job: its mountings and cables may remain after the reflector comes down.
A satellite dish is mounted to receive signals, so its size and position can leave sections of the exterior hard to reach. Before arranging removal, confirm that the dish is no longer needed and that taking it down can be done safely. If it serves a communal system, check that it can be removed before proceeding.
Remove redundant hardware and address its fixing points before painting, so you can inspect and prepare the surface without working around obstructions.
What can remain on the wall after a dish is removed?
Taking down the dish alone may leave several separate items behind:
- Mounting bracket: the arm or frame secured to the exterior.
- Fixings: screws, bolts or wall plugs holding the bracket in place.
- Redundant cabling: visible cable runs that are no longer required.
- Holes or marks: traces left where the hardware was attached.
Once the equipment is removed, check the area it covered as well as the fixing points. Holes or surface marks may need attention before paint is applied. The appropriate repair depends on the wall material, its condition and how the dish was installed, so don’t assume every wall needs the same treatment.
Can you paint around a satellite dish instead?
Painting around a dish may seem quicker if it’s still in use or removal can’t be arranged safely. However, the hardware can make it awkward to reach the wall, and the covered area stays unpainted. If the dish is removed later, that difference may be visible.
If the dish is redundant and removal can be arranged safely, taking it down first gives you better access and a clearer view of the surface. If it’s still needed, or access and fixings make DIY removal unsuitable, don’t force the job. Decide on a safe, practical approach before painting begins.
How to plan satellite dish removal before painting
Planning helps put the work in the right order and prevents you from painting around hardware that still needs to come down. Before removing a satellite dish before painting, check whether it’s redundant, where it’s mounted, how accessible it is and what may need attention on the wall afterwards.
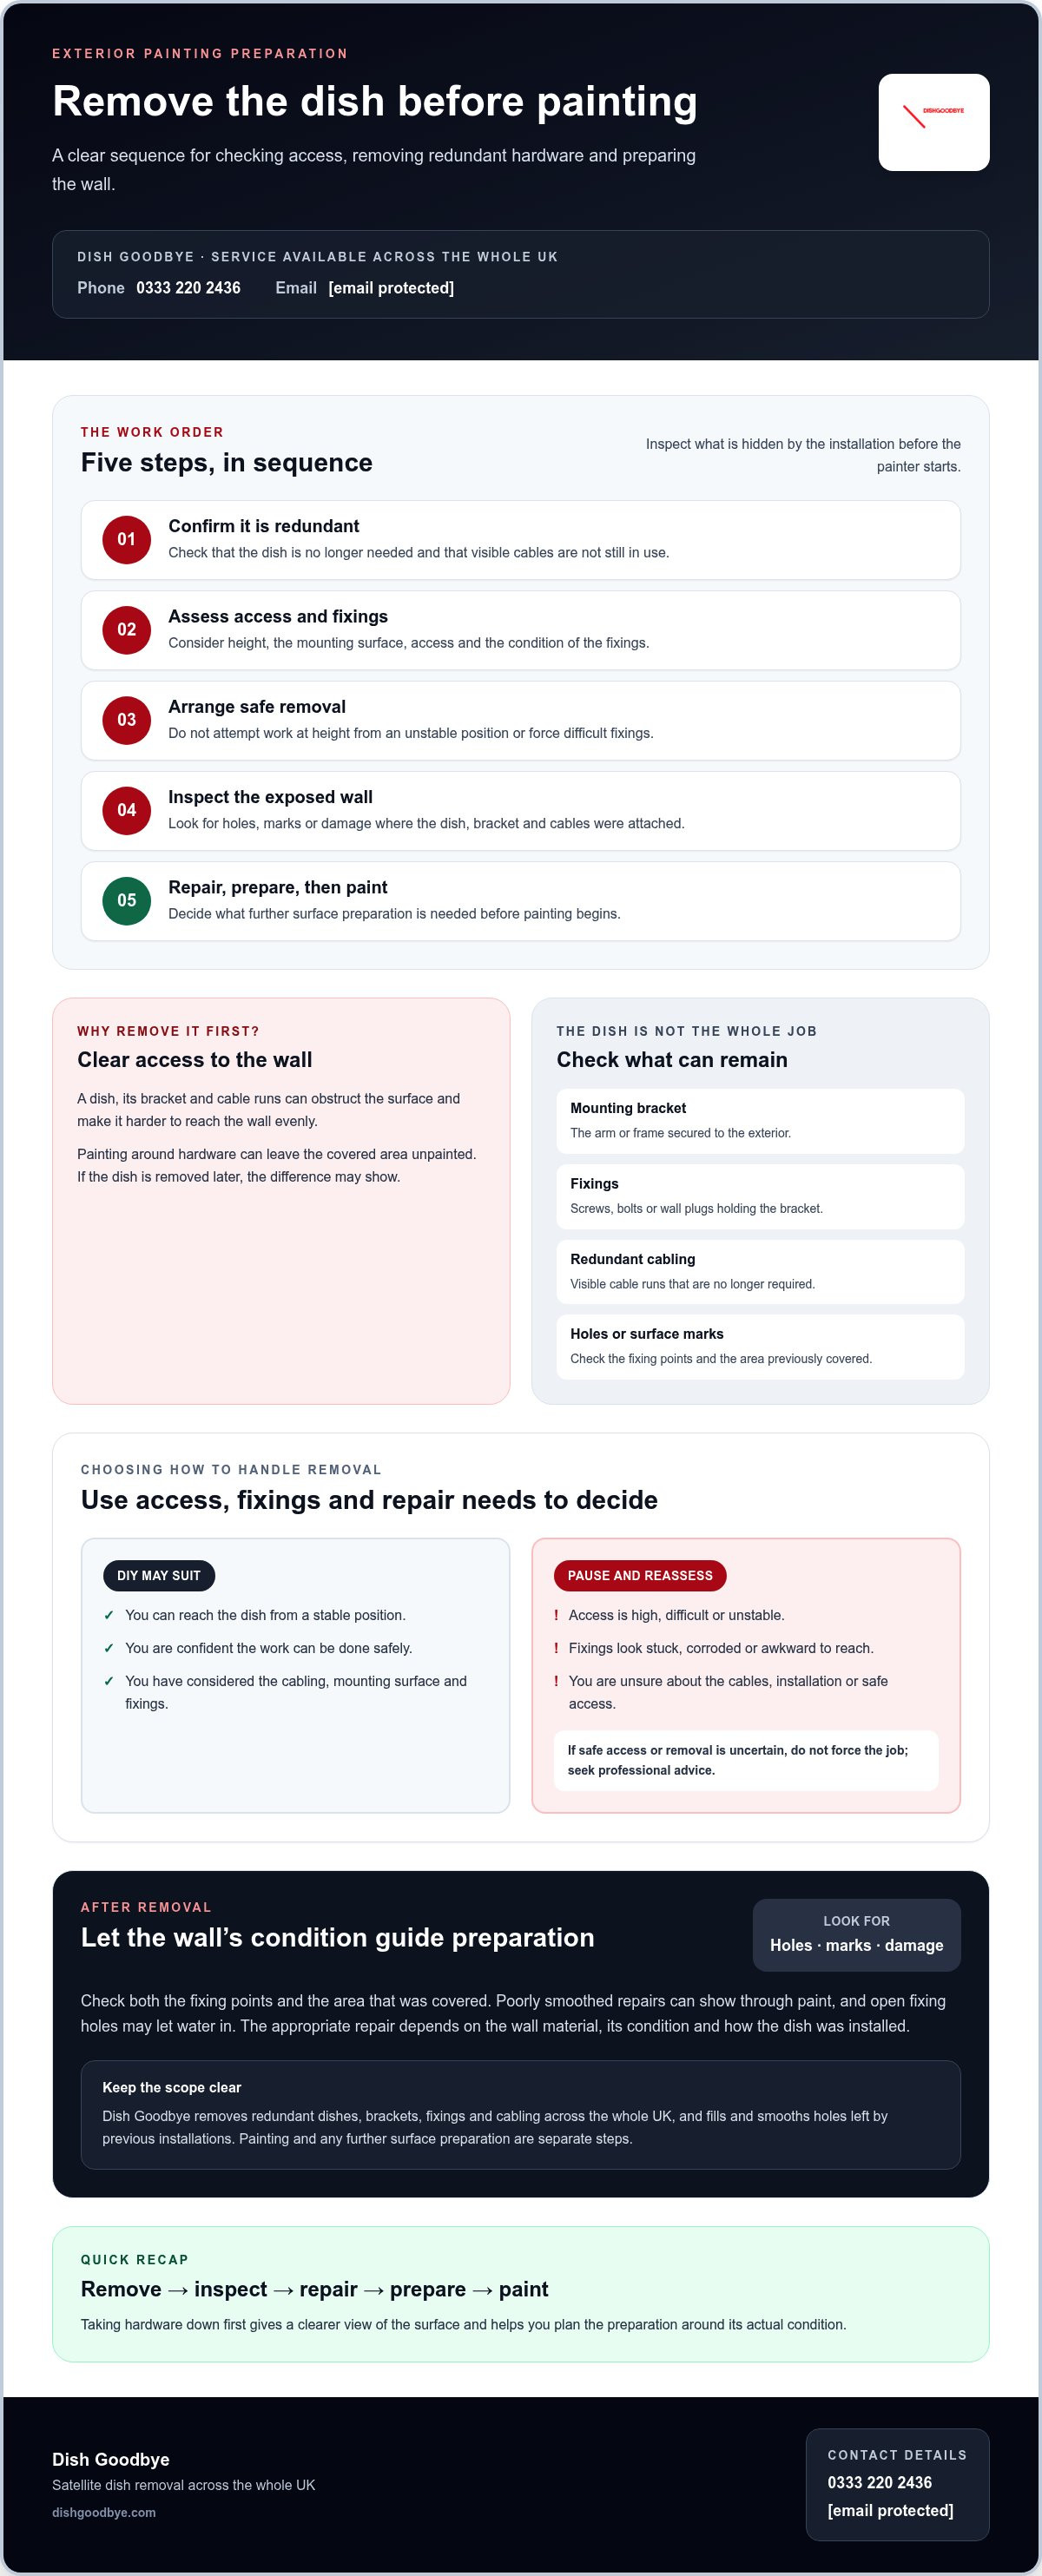
Use this sequence:
- Assess the dish: Confirm it’s no longer needed and check whether visible cables may still be in use.
- Choose a removal approach: Consider the height, access, mounting surface and condition of the fixings.
- Arrange removal: Don’t attempt work at height if the access or your position feels unstable or unsafe.
- Inspect the exposed wall: Look for holes, marks or damage once the dish, bracket and redundant cabling are gone.
- Repair and plan painting: Establish what further surface preparation is needed before arranging the painting work.
Remove, inspect, repair, prepare, then paint. This order lets you respond to the wall’s actual condition instead of guessing what may be hidden behind the dish.
What should you check before removal begins?
Start by confirming the dish is redundant. Don’t assume every visible cable is disconnected or unused. Check where the dish is mounted and what the surrounding surface is made of. Consider whether the equipment is high up, difficult to reach or secured with fixings that look weathered. If you’re uncertain about the cabling, installation or safe access, pause and seek professional advice rather than forcing the job.
When is professional dish removal the sensible option?
Difficult access, an unstable working position or fixings that appear stuck, corroded or awkward to reach are reasons to stop and reassess. A fall risk isn’t worth a rushed DIY attempt. If you can’t reach the dish from a stable position or aren’t confident you can work safely, leave the removal to a professional.
Professional removal can cover more than the dish itself, including its bracket, fixings and redundant cables. Dish Goodbye provides satellite dish removal across the UK and fills and smooths holes left by previous installations. Painting is not included, so arrange it separately once the wall’s condition and any further preparation needs are clear. If professional removal suits your project, explore satellite dish removal across the UK.
DIY removal or professional help: what suits your painting project?
DIY may be reasonable when the dish is easy to reach, the fixings are accessible and you can work without an unstable position. But removing satellite dish before painting isn’t just a choice between effort and convenience. The wall’s condition after removal matters too. Cracked masonry or stubborn fixings can turn a simple task into repair work that affects the finish.
Use this comparison to assess what suits your situation. It isn’t a rule that every dish needs a professional, or that a low-mounted dish is automatically safe to remove yourself.
| What to consider | DIY may suit if… | Consider professional help if… |
|---|---|---|
| Access | The dish and fixings are safely reachable from a stable position. | It’s high up, difficult to reach or requires an unstable working position. |
| Task scope | You can identify the dish, bracket, fixings and redundant cabling that need attention. | The cable route or installation is unclear, or the fixings appear complex or weathered. |
| Wall repair | You can inspect the exposed area and are prepared to arrange any necessary repairs. | You’re concerned about damaged masonry or want the fixing holes filled and smoothed as part of removal. |
| Who handles each step | You take responsibility for removal and arranging any follow-up surface preparation. | A removal service handles the equipment and its stated hole-filling and smoothing scope; painting remains a separate job. |
What makes DIY removal a poor fit?
Pause if access is awkward, the dish is at height, the fixings are uncertain or the surrounding masonry looks damaged. Don’t climb or continue from a position that feels unstable. If safe access is in doubt, leave the removal to a professional. The aim is a clear surface for the next stage, not a rushed task that risks injury or worsens damage.
What should a complete removal service cover?
Before booking, ask whether the service includes the dish, brackets, fixings and redundant cabling, rather than just the dish itself. Check how fixing holes will be filled and smoothed, and whether further surface preparation is needed before painting. Dish Goodbye provides satellite dish removal across the UK, including removal of these components and filling and smoothing holes left by previous installations. Painting is not included.
For more detail, see Professional Dish Removal Service: Protecting Your Property from Redundant Tech. You can also explore Dish Goodbye satellite dish removal as a UK-wide option when access or repair needs make DIY unsuitable.
How to prepare the wall for painting after dish removal
Once the dish, brackets, fixings and redundant cables are removed, inspect the newly exposed area before planning paintwork. The wall may show fixing holes, marks or damage that wasn’t visible behind the equipment. Conditions vary with the mounting surface and installation, so assess the actual wall rather than assuming it needs a standard repair.
Assess repairs before applying primer or paint. This check helps you identify whether the surface needs attention beyond the holes left by the fixings.
How should fixing holes and marks be handled?
Open fixing holes can interrupt an even surface and remain visible beneath a new coat of paint. Filling and smoothing them creates a more even starting point, but it isn’t the same as preparing or painting the whole wall.
Dish Goodbye’s removal service includes filling and smoothing holes left by previous installations. It doesn’t include applying primer or paint, and it doesn’t automatically cover other preparation, such as cleaning the wall or repairing damage beyond the fixing holes. After the repair, inspect both the filled spots and the surrounding surface to decide what further preparation is appropriate.
- Check for remaining holes, marks or visible damage.
- Look at how the repaired areas meet the surrounding wall.
- Follow the instructions for any products used in later preparation or painting.
When can the painting work move forward?
Move on to painting only after assessing the repairs and deciding what additional preparation the wall needs. Follow the relevant product instructions for any further cleaning, priming or painting, rather than relying on a guessed drying time or a one-size-fits-all method. If the wall has damage beyond the fixing holes, consider whether it needs attention before paintwork begins.
Removing the dish and smoothing its fixing holes can leave the exterior ready for the next preparation step, but what happens next depends on the wall’s condition. Dish Goodbye removes redundant satellite dishes, brackets, fixings and cabling across the UK, and fills and smooths holes left by previous installations. Painting is arranged separately.
For a clearer starting point before your exterior painting project, explore Dish Goodbye’s satellite dish removal service.
Arrange satellite dish removal before your next exterior paint job
Sort removal before the painting is planned. This checklist helps you move from deciding whether the dish should come down to checking the exposed wall:
- Confirm the dish is redundant. If you’re unsure whether it or its cabling is still in use, check before arranging removal.
- Assess access. Note the mounting position and whether it looks safely reachable. Don’t attempt removal if access feels unsafe.
- Arrange removal. Confirm the scope includes the dish and any other redundant equipment you want taken down.
- Inspect the wall and repairs. Check the exposed area and clarify what has been filled and smoothed.
- Plan painting. Decide whether further surface preparation is needed, then arrange painting separately.
Dish Goodbye removes redundant satellite dishes, brackets, fixings and cabling across the UK. The service also includes filling and smoothing holes left by previous installations. It doesn’t include painting, primer or further surface preparation, so inspect the wall after removal and establish what it needs before paintwork begins.
What information should you have ready when enquiring?
Describe where the dish is mounted, how easy it is to access and what cabling you can see. Mention any concerns about the wall or fixings, and explain that exterior painting is planned. This helps clarify the removal and hole-repair scope without assuming what the wall will need afterwards.
Dish Goodbye serves customers across the UK. To ask about satellite dish removal, call 0333 220 2436 or email [email protected].
What are the next steps after removal?
Once the work is complete, inspect the exterior and confirm the repair scope. Check the filled fixing points and the surrounding surface, then decide whether additional preparation is needed. Follow the instructions for any products used for later preparation or painting. Don’t assume removal includes paint or primer.
For a straightforward next step, explore satellite dish removal across the UK. You can also consider how a cleaner exterior supports kerb appeal as you plan the rest of your project.
Dish Goodbye contact details: 0333 220 2436 | [email protected]
Set your exterior painting project up for a smoother finish
Removing satellite dish before painting gives you a chance to uncover the whole surface, address fixing holes and plan further preparation before paintwork begins. Check whether the dish is redundant and whether access is safe. Then inspect the wall after removal, because repair and preparation needs depend on its condition.
Dish Goodbye removes redundant dishes, brackets, fixings and cabling across the UK, then fills and smooths the holes left by previous installations. Removed metal and electronic waste is processed through approved recycling centres. Painting, primer and further surface preparation are separate, so check the wall and arrange those steps independently.
Ready to clear redundant equipment before your next exterior paint job? Arrange UK-wide satellite dish removal. With the removal and repair scope clear, you can move on to planning a better-prepared exterior.
Dish Goodbye: 0333 220 2436 | [email protected]
Frequently Asked Questions
Should I remove a satellite dish before painting?
Usually, remove a dish if it or its bracket blocks the area you plan to paint. The fixings and visible cable runs may also need attention because they can interrupt access and the finished surface. Removing satellite dish before painting isn’t essential for every installation, though. First confirm the dish is redundant and removal can be arranged safely. Then inspect the exposed wall and address any holes or damage before painting.
Can I paint around an old satellite dish?
You can paint around a dish, but the wall beneath it will remain untreated, and working around the hardware may make an even finish harder to achieve. Removing it first exposes more of the surface for inspection and preparation. Before deciding, check whether the dish is redundant and whether removal is safe. If it’s still in use, don’t remove it without confirming what the equipment serves.
Can I remove a satellite dish myself before painting?
That depends on the dish’s position, access, fixings and the condition of the wall, as well as whether you can work safely. Don’t attempt the job if it requires an unstable position or unsafe access at height. Consider professional removal if the dish is difficult to reach, its fixings are uncertain or the masonry looks damaged. A careful decision can prevent a straightforward painting project from becoming a more difficult repair.
What should be removed along with a satellite dish?
A complete removal may include the mounting bracket, fixings and redundant cabling, not just the dish. Before removing any cable, check whether it’s still in use or connected to equipment that needs to remain. Clearing redundant hardware gives you a better view of the wall and makes it easier to inspect the fixing points before painting. Confirm the removal scope in advance so brackets or cable runs aren’t unexpectedly left behind.
How do you prepare a wall after removing a satellite dish?
Inspect the exposed wall for fixing holes, marks or damage, then check the repaired area before deciding on further preparation. Dish Goodbye fills and smooths holes left by previous installations as part of its removal service. It doesn’t apply paint or primer, and further preparation may still be needed. The wall’s condition determines the next steps, so follow the instructions for any products you use and don’t assume a set drying time.
Can old satellite dish fixing holes cause damp?
Unaddressed fixing holes can let moisture affect an exterior, depending on their condition and location. That doesn’t mean every hole will cause damp, but it’s sensible to have the holes assessed and filled before painting. Take particular care if you can already see signs of moisture or damage nearby. Repairing the fixing points addresses a potential entry route, but it isn’t a guarantee against damp or a substitute for investigating existing moisture.
Does Dish Goodbye paint the wall after removing a satellite dish?
No. Dish Goodbye removes redundant satellite dishes, brackets, fixings and cabling across the UK, and fills and smooths holes left by previous installations. Painting, applying primer and any additional surface preparation aren’t included in the service. After removal, inspect the wall and confirm what else it needs before arranging paintwork. The appropriate next step depends on the exposed surface, so don’t assume hole filling alone means the wall is ready for paint.