

Dish Goodbye | dishgoodbye.com | 0333 220 2436 | [email protected].
What if a neat-looking patch still leaves a route in for pests? When filling holes after satellite dish removal, inspect the opening and the surrounding wall before covering the visible gap.
A general-purpose filler may not be suitable for an exterior repair. The material needs to match the wall surface and withstand the conditions it will face. An unsealed gap can provide access for insects or other pests, while dampness, crumbling masonry or a widening hole may signal damage that needs more than a quick patch.
This guide explains how to assess fixing holes, choose a suitable repair approach for masonry or another exterior surface, and recognise signs that need further attention. Removing brackets and fixings, dealing with redundant cabling, and making good the holes are best considered together. Dish Goodbye removes redundant satellite dishes across the UK, including associated fixings and cabling, and fills and smooths the holes left behind.
Key Takeaways
- Before filling holes after satellite dish removal, check for loose or crumbling material around each opening.
- Match the exterior repair material to the wall surface and size of the gap. A cable-entry opening may need a different approach from a small fixing hole.
- For small, accessible holes, follow a clear sequence: prepare the surface, fill the hole, finish neatly and check the repair.
- Damp, damaged masonry or an opening larger than a fixing hole may need further attention before a surface patch.
- Dish Goodbye removes dishes, brackets, fixings and cabling, and fills and smooths the resulting holes across the UK.
Why Fill Holes After Satellite Dish Removal?
Removing the dish and its fixings is only part of the job. The exposed fixing points should be assessed and, where appropriate, filled and smoothed. Check for larger gaps around brackets or cables as well as the small screw or bolt holes. A tidy finish matters, but the repair also needs to suit the size of the opening and the condition of the wall beneath it.
An exposed gap can offer insects or other pests a route into a wall cavity or sheltered space. That does not mean every small hole will attract pests, but leaving a visible opening unsealed leaves a potential access point. Preventing access is known as exclusion, one of the approaches described in Pest Control Methods.
Inspect every exposed fixing hole before filling it, so the repair addresses the opening and any surrounding damage. Filling is not a remedy for damp, crumbling masonry or other underlying problems. If the wall is wet, the edges are breaking away or the damage extends beyond the hole, identify the cause before covering the surface. A smooth finish should follow a sound repair, not conceal a problem.
What holes and gaps can remain after a dish comes down?
Small fixing holes are left by the screws or bolts that held the dish bracket to the wall. A bracket may have several attachment points, so check for each one rather than assuming there is only a single opening. There may also be a wider hole where a cable passed through the wall. This is a different type of opening and may need a different repair from a shallow fixing hole.
Old sealant may partly cover a gap, making its actual size difficult to see. Loose filler, crumbling edges or damaged surface material can also obscure its extent. Check the area visually and note whether the opening is limited to the fixing point or continues into the surrounding wall. The number and condition of the openings depend on how the original dish, bracket and cable were installed, so inspect the whole area rather than relying on a standard pattern.
How can an exterior gap become a pest-entry point?
A gap through the outside surface may give insects or other pests access to sheltered spaces behind the wall finish. Its position, size and connection to other openings all matter. A visible opening does not prove pests are present, and sealing a dish fixing does not replace checking nearby cracks, gaps or signs of damp and damage.
Start by closing the openings left by the installation, then check the surrounding wall for other visible routes in. A neat patch over a fixing point will not address a separate cable-entry gap or a split in the surface. If an opening is larger than expected or the surrounding material is loose, pause before filling it. Establishing the full extent of the gap helps you choose a repair that closes it rather than disguising its edges.
Inspect the Wall Before Sealing Satellite Dish Fixing Holes
Before choosing filler or sealant, inspect every visible opening and the wall around it. The aim is to tell a small, stable fixing point apart from a larger penetration or an area of masonry that needs more than a surface repair.
How to assess the opening and surrounding surface
Inspect from a safe, accessible position, such as the ground or a suitable existing access point. Do not climb or move remaining equipment for a closer look. Use good light and check the whole area where the bracket and cable were attached. If the dish or fixings are still in place, leave them undisturbed during this visual check.
Look for firm material around each opening. Powdery or crumbling edges, loose flakes, cracks radiating from a hole or a patch that appears to be lifting may indicate that the damage extends beyond the fixing point. Note whether each opening is a small screw or bolt hole, a larger bracket penetration or a cable route through the wall. Its size and shape help determine a suitable repair approach.
If there are several openings, make a simple written note of their locations and whether the edges look intact or damaged. Do not probe the wall or pull at loose material. A visual check is enough to decide whether a straightforward patch seems appropriate or further assessment is needed.
When should you pause before filling a hole?
Pause before cosmetic filling if you can see active damp, significant cracking or masonry that looks unstable. Discolouration, a persistently wet patch or material breaking away around the opening deserves attention before it is covered. Filler can close a visible gap, but it cannot identify or correct the cause of water ingress. Covering the signs may leave the underlying issue unresolved.
A small fixing hole in firm, dry material may suit a simple patch. Damp, spreading cracks or unstable masonry need further assessment first. This is a practical guide, not a diagnosis. If damage extends across the wall surface or the edges continue to break away, arrange an appropriate property repair assessment before filling. That gives you a clearer basis for deciding how to make good the area.
Inspect first, then match the repair to what you find. If you would rather have the dish removal and resulting holes handled together, Dish Goodbye’s satellite dish removal service includes removing associated fixings and filling and smoothing holes left by previous installations.
Choose an Exterior Repair Material That Suits the Wall
There is no single filler suited to every opening. Match the repair to both the wall finish and the gap: a small fixing hole in sound masonry is different from a wide cable penetration or chipped render. Choose a material intended for that surface and exterior exposure, rather than simply creating a smooth-looking cover.
What repair approach suits brick, masonry, or render?
For a small hole in sound brick or masonry, an exterior masonry filler may be suitable. Check the packaging to confirm the surfaces and repair sizes it covers. Render needs extra care: if it is cracked, hollow-looking or missing around the hole, filling the centre alone may leave damaged edges exposed. The surface may need repair as well as the opening.
Use this guide to identify the appropriate repair category, then follow the product instructions for suitability, preparation and curing. Do not assume an interior or general-purpose filler is suitable for outdoor use.
| Surface or opening | Suitable repair category | Key limitation |
|---|---|---|
| Small fixing hole in sound brick or masonry | Exterior masonry filler | Only appropriate if the surrounding material is firm and the product suits the surface and hole. |
| Small hole through sound render | Exterior repair material intended for render | A damaged or loose render edge may need attention beyond filling the centre. |
| Wider cable-entry gap | Suitable exterior seal or repair approach for the penetration | Filler alone may not suit a larger or irregular opening. Consider its depth and exposure to weather. |
| Cracked, damp or unstable surrounding surface | Further assessment before cosmetic filling | A surface patch will not resolve the cause of moisture or broader wall damage. |
How should a cable-entry gap differ from a small fixing hole?
A cable-entry opening may be wider, deeper or less regular than a screw hole, so a dab of filler may not close it properly. Consider its shape, depth and exposure to wind-driven rain, then choose an exterior repair category intended for that kind of gap. If you cannot tell what an opening or nearby feature is for, do not block it until its purpose is clear.
Check that the cable route is redundant before sealing its entry point. A fixing hole left by a removed bracket and a cable penetration require different repairs. Choose material for the actual opening, prepare the surface as directed, and allow the stated curing time before assessing the finish or exposing it to conditions mentioned in the product instructions. Matching the repair to the gap helps avoid a quick cosmetic cover that misses the opening.
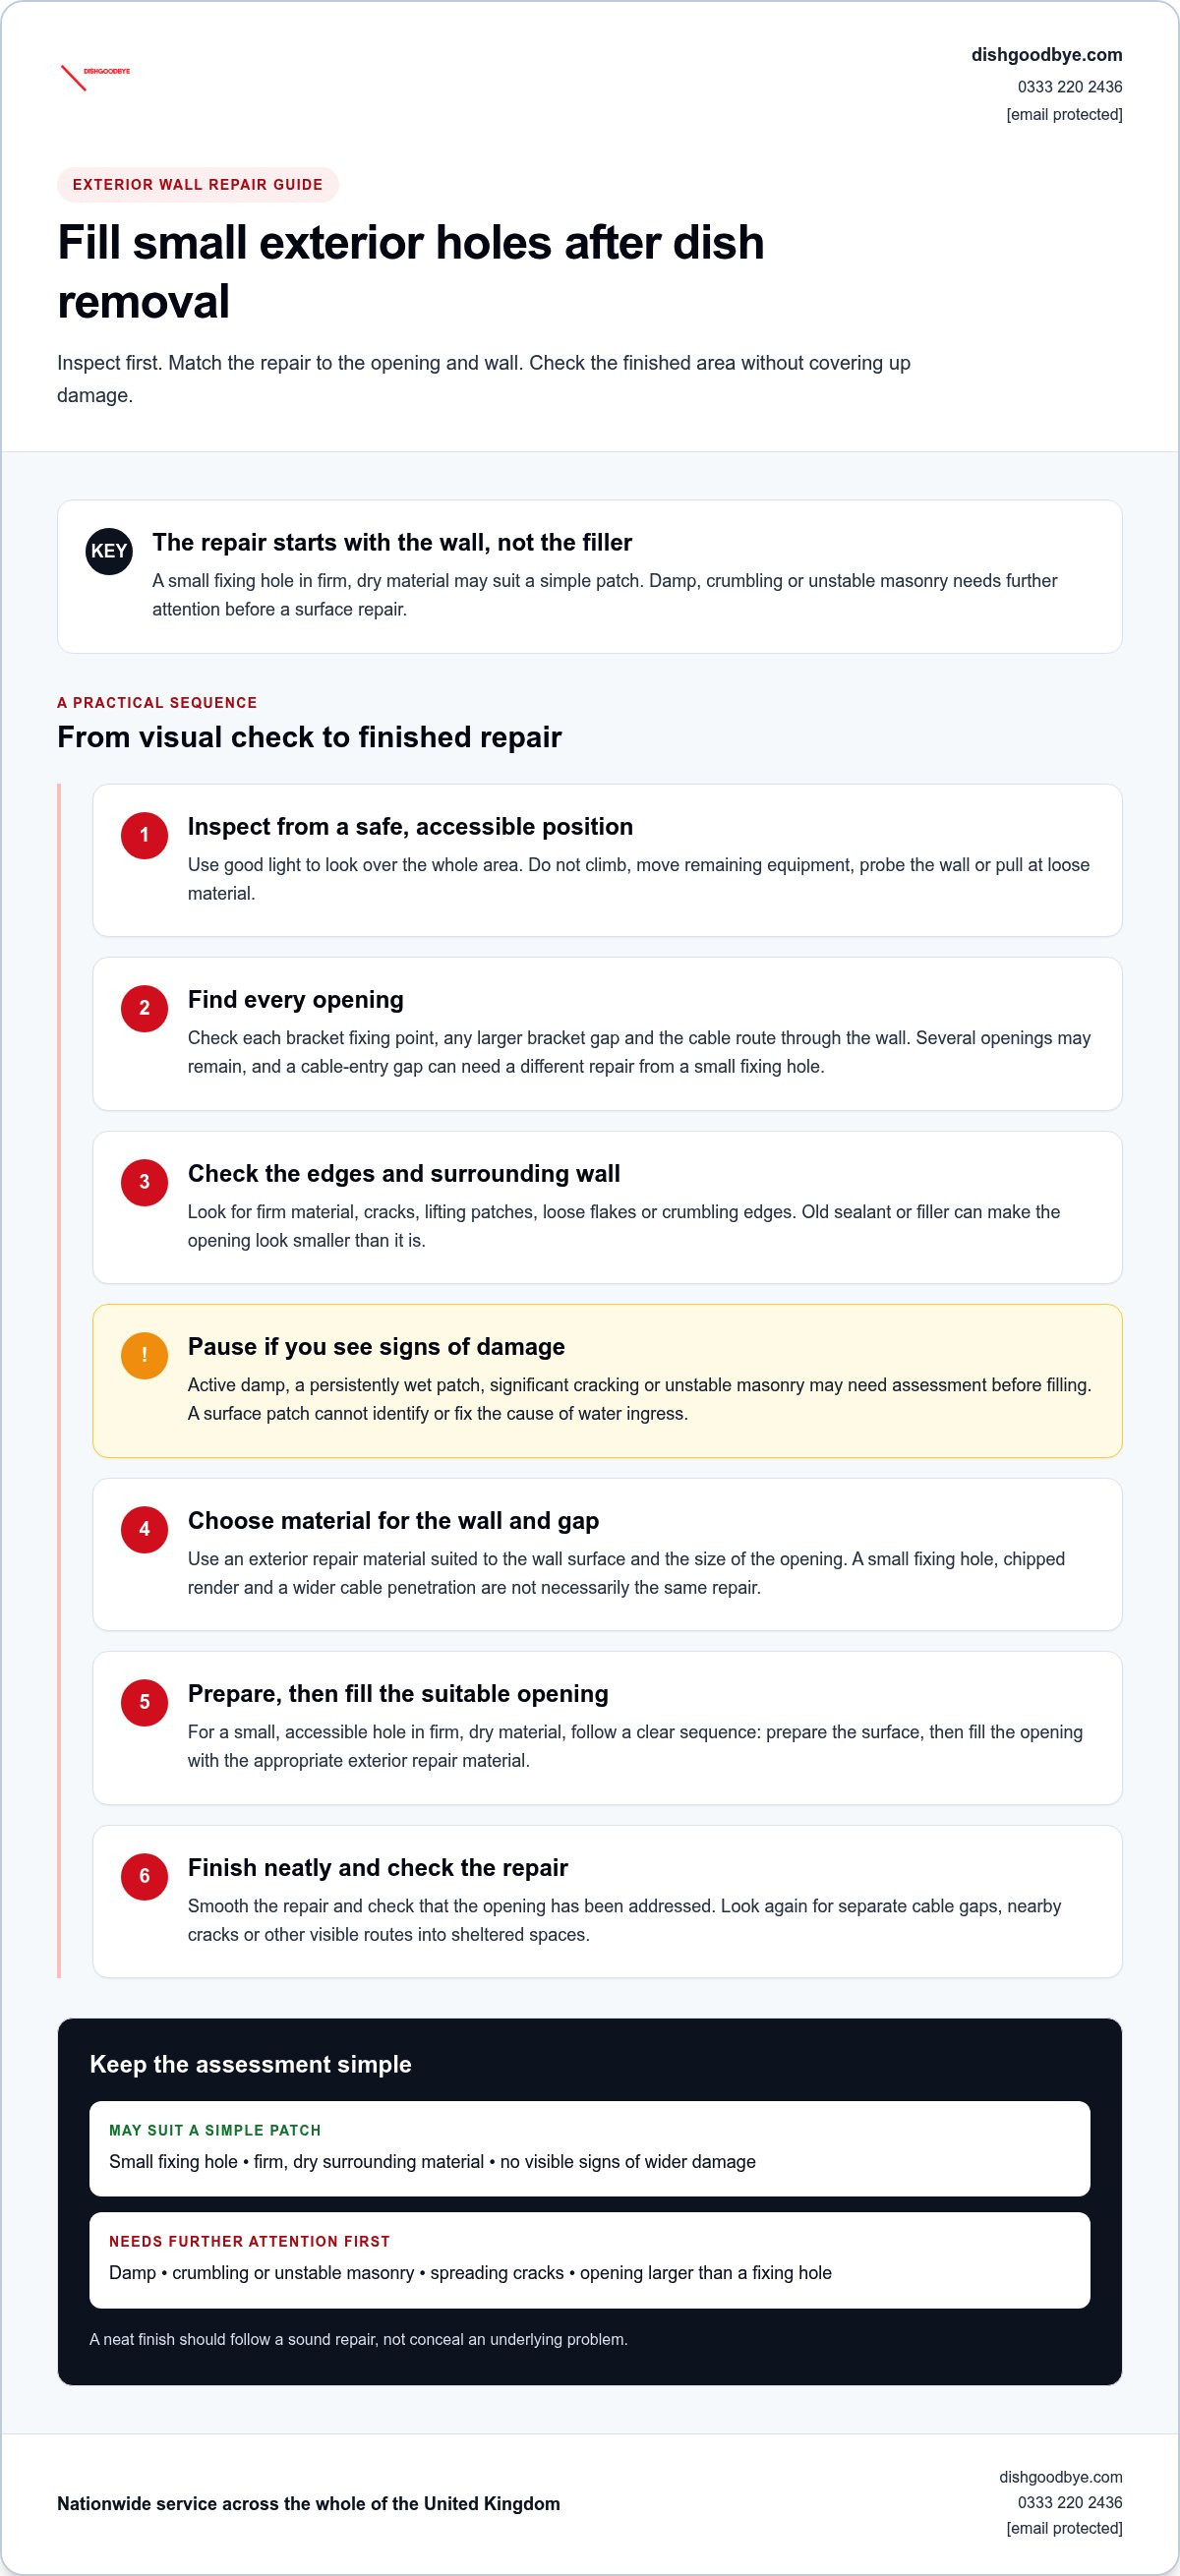
How to Fill Small Exterior Holes After Dish Removal
This method is for small, accessible fixing holes after the dish and its fixings have been removed. Do not use it for a large cable opening, loose masonry, active damp or work that requires access at height. Choose an exterior material suited to the wall and follow its instructions closely.
Inspect the hole, prepare it as directed, fill it carefully, smooth the surface, then check the repair after it has cured.
- 1. Inspect: Confirm the opening is small, the surrounding surface looks sound and the hole is accessible from a safe position. Pause if you notice damp, spreading cracks or crumbling material.
- 2. Prepare: Check the chosen material’s instructions for surface preparation and suitable weather conditions. Gently remove loose debris without enlarging the hole or damaging firm material around it.
- 3. Fill: Apply a suitable exterior filler according to its instructions. Work it into the opening rather than leaving a visible void, and avoid spreading excess material over the surrounding finish.
- 4. Finish: Smooth the repair so it sits neatly with the wall surface. Follow the material’s directions for shaping, curing and any further finishing, as these steps vary by product.
- 5. Check: Once the repair has cured as directed, look for gaps, cracks or signs of continuing moisture.
Prepare the hole and apply a suitable filler
Keep preparation light and controlled. A soft brush or another method recommended by the product instructions can help clear loose dust and debris. Do not scrape away sound brick, masonry or render just to make the hole look larger. Some materials require a particular surface condition or preparation, so do not dampen, prime or treat the opening unless the instructions say to.
Apply the filler as specified, pressing it into the hole rather than laying a thin cover over the front. If the opening is deeper than the material’s instructions allow for one application, follow the stated method instead of improvising. A shallow smear may look neat at first but leave an unfilled space behind it.
Finish the surface and check the repair
Shape the repair at the stage recommended for finishing. Aim for a level, tidy join with the surrounding wall, but do not overwork the material or disturb the edges. Follow the stated curing conditions, including any guidance about exposure to rain or other weather. A later visual check can help you spot a gap, fresh cracking or moisture that needs further attention.
If you would prefer the removal and patching handled together, arrange satellite dish removal with hole filling through Dish Goodbye.
When Professional Dish Removal Makes Hole Repair Easier
Taking down a dish can involve several connected tasks: removing the equipment, detaching brackets and fixings, dealing with redundant cabling, and making good the wall. If you would rather avoid exterior DIY, having these steps handled together can simplify the job. You do not have to arrange removal first and then tackle the remaining openings yourself.
What a complete dish removal can take care of
Dish Goodbye removes redundant satellite dishes and Sky dishes across the United Kingdom, along with associated brackets, fixings and cabling. Technicians fill and smooth holes left by previous installations, helping leave the exterior neater once the equipment is gone. This joined-up service is useful if you would rather have the wall openings addressed as part of the removal instead of taking on a separate DIY task.
The sequence is straightforward: the equipment and attachments are removed, then the resulting holes are made good. Wall conditions vary between installations, so the work is handled according to the individual job requirements. Removed metal and electronic waste is processed through approved recycling centres.
How to take the next step
If you are considering filling holes after satellite dish removal, decide whether to manage the removal and exterior patching yourself or have both handled together. A small, accessible hole in sound material may be manageable as a DIY repair. Having the complete job handled together can be more convenient if you would rather avoid working on an exterior wall or coordinating separate tasks.
To describe the job clearly, note whether the dish is still attached, whether brackets or cables remain, and whether you have noticed visible wall damage. This helps explain what needs doing without guessing at the repair. Mention any damp, loose masonry or damage beyond the fixing points so the condition of the wall is not overlooked.
Dish Goodbye provides satellite dish removal throughout the UK, including removal of associated fittings and cabling, plus filling and smoothing holes left by previous installations. Explore the nationwide satellite dish removal service to have the removal and resulting patching handled together.
Contact Dish Goodbye at dishgoodbye.com, call 0333 220 2436, or email [email protected].
Make the Next Step Simple
Choose the next step to suit the wall and the work involved. If you are tackling a small, accessible repair yourself, follow the material instructions and check the area again after it has cured. If the job involves removing equipment or reaching an awkward exterior spot, do not take unnecessary risks. Planning the work carefully helps leave the wall tidy and the opening properly addressed.
For a simpler option, arrange nationwide satellite dish removal with the resulting exterior hole filling handled as part of the job. Arrange satellite dish removal and exterior hole filling with Dish Goodbye. Contact the team to get started.
Contact: dishgoodbye.com | 0333 220 2436 | [email protected]
Frequently Asked Questions
Can I fill satellite dish holes without removing the dish first?
Fill the openings only after the dish and its fixings have been removed. This guide covers making good an exposed wall, not working around attached equipment. Do not climb, loosen brackets or reach past a window to access a hole. If removal involves height, awkward access or fixings you are unsure about, do not attempt it yourself. Arrange suitable dish removal, then inspect the exposed wall before choosing a repair.
Can expanding foam seal a hole left by a satellite dish?
Expanding foam may suit some gaps, but do not assume it is a complete exterior repair or a suitable visible finish. The opening’s size, depth, wall material and exposure to weather all matter. Check the product instructions for exterior suitability and compatibility with the surface. Consider whether the repair needs a separate weather-facing finish. For a small masonry fixing hole, choose a repair material specified for that type of surface.
How long should exterior filler take to dry?
There is no single drying time for every exterior filler. The material, repair depth and conditions during application can affect how long it takes to dry or cure. Read the product instructions for the stated timing and any limits on applying another coat or finishing the surface. Do not judge readiness only by whether the surface feels dry. Allow the full instructed period before painting or exposing it to conditions mentioned on the packaging.
Can rain affect filling holes in an exterior wall?
Rain may affect a repair, but the right decision depends on the filler or sealant and the conditions it is designed for. Check its instructions for requirements relating to a wet surface, rain during application and curing. Do not assume a sheltered spot or a brief dry spell makes every material suitable. If conditions fall outside the stated guidance, wait until they are suitable rather than risk applying the product incorrectly.
What if a hole left by a dish is larger than a screw hole?
A larger opening may be a cable-entry point or a gap around a bracket, so it may need a different approach from a small fixing hole. Check its width, depth and shape, and whether the surrounding finish is intact. Do not pack it with ordinary filler by default. Choose a repair category intended for that kind of opening, and pause if the hole extends into damaged or loose wall material.
Will filling satellite dish holes stop pests getting into my home?
Sealing a visible opening can help close one possible route into a wall or sheltered space, but it cannot guarantee that pests will not enter elsewhere. Check nearby cracks, cable openings and gaps around other exterior features too. If you notice signs of pest activity inside, filling one dish fixing may not address the source. Treat the patch as one practical step, not proof that every potential entry point has been closed.