

Contact our nationwide team at 0333 220 2436 or [email protected]. Did you know that an estimated 15% of damp issues in the upper floors of UK homes are caused by poorly sealed holes in exterior walls? It's a startling figure that turns a simple aesthetic problem into a structural worry. Repairing wall after satellite dish removal is the essential final step to reclaim your home's curb appeal and keep the rain where it belongs.
We know how frustrating those leftover bolt holes can be. They're often the only thing standing between you and a perfectly clean house front. You want a home that looks modern and well-managed, not one cluttered with redundant brackets and old tech. This guide will teach you how to professionally seal, fill, and hide those unsightly marks for a weather-proof finish. You'll discover the right materials to use and the secrets to making repairs look invisible across the whole of the UK. Let's restore your property to its former glory.
Key Takeaways
- Understand why leaving old brackets leads to unsightly rust stains and internal damp, making immediate repairs a priority for home maintenance.
- Master the technique for repairing wall after satellite dish removal by using specialized masonry fillers and pigments to create an invisible, weather-proof finish.
- Identify the essential toolkit required, from small pointing trowels to compressed air, to ensure every cavity is clean before sealing.
- Learn the secret to matching aged, weathered brickwork so your repairs blend seamlessly with your property’s unique exterior.
- Discover the safety advantages of professional removal, ensuring all e-waste is recycled according to UK regulations without the risks of DIY ladder work.
Contact our nationwide UK team at 0333 220 2436 or [email protected] for expert assistance across the country.
Why Repairing Wall Holes After Dish Removal is Essential
Leaving an old satellite dish to rot on your exterior wall is a recipe for masonry disaster. Most homeowners think the job is finished once the plastic dish is gone, but the real work starts with the brickwork itself. Repairing wall after satellite dish removal is about more than just looks. It's a vital structural safeguard. When you remove old tech, you're often left with four to six deep cavities that penetrate the protective envelope of your home. Ignoring these holes is an open invitation for the British weather to move inside.
The "Bracket Rot" Effect
Old satellite brackets are the primary source of rust staining on UK masonry. Over years of exposure to rain, the iron oxide from these metal fixings bleeds deep into your porous brickwork. This isn't just a surface smudge; it's a chemical stain that's incredibly difficult to scrub away. If you leave the old bolts in the wall, they continue to corrode even after the bracket is gone. You must extract the fixings completely to stop this "bleed" and protect your home's valuation. A clean, restored wall suggests a well-maintained property, while rust streaks scream neglect to potential buyers.
Understanding Water Ingress and Damp
Small 10mm holes act as perfect conduits for driving rain. Water bypasses the brick face and travels straight into the cavity or the inner leaf of your wall. According to industry data from 2023, an estimated 15% of damp issues in the upper floors of UK homes are caused by poorly sealed cable entry points and holes. This leads to "blown" interior plaster and peeling wallpaper. When you learn how to repoint mortar joints or fill these specific cavities, you're creating a weather-proof barrier that keeps your home dry and comfortable. Proactive sealing prevents long-term masonry erosion and saves you from expensive internal repairs.
Trapped water is also a silent killer for bricks during the winter. When moisture sits inside an unfilled hole, it freezes and expands. This internal pressure causes the brick face to crack or flake off, which is known as spalling. Once the hard outer shell is gone, the soft interior of the brick erodes rapidly. You can find professional removal and repair services across the whole of the UK at dishgoodbye.com. Say goodbye to the clutter and the risk of damp in one simple step. Restoring your wall is the final move in decluttering your home exterior for a fresh, modern aesthetic.
Contact our nationwide UK team at 0333 220 2436 or [email protected] for expert assistance across the country.
Contact our nationwide UK team at 0333 220 2436 or [email protected] for expert assistance across the country.
Essential Tools and Materials for Exterior Wall Repair
Achieving a professional finish when repairing wall after satellite dish removal starts with the right kit. You can't just slap a bit of interior polyfilla into a brick hole and expect it to survive a British winter. You need materials that expand and contract with the temperature while keeping moisture out. For most UK homes, your basic toolkit should include a stiff wire brush, a small pointing trowel, and a blow-out bulb or compressed air canister. These tools help you clear the grit and apply the filler with precision.
Safety is your absolute priority. Working at height on a ladder is the most dangerous part of any DIY project. Ensure your ladder is on level ground and follow the safety guidelines found in the UK Building Regulations for home maintenance. If you aren't comfortable on a ladder, it's always better to call in a professional nationwide service like Dish Goodbye to handle the heights for you. We provide a seamless removal and repair service across the whole of the UK, so you don't have to worry about the heavy lifting.
Choosing the Right Filler for Your Wall
The type of wall you have dictates the filler you need. For traditional brickwork, a classic sand and cement mortar mix is often the best choice. It matches the texture of the surrounding mortar joints and provides a structural fix. If your home has a rendered or painted finish, look for exterior-grade acrylic or silicone sealants. These are flexible and easier to smooth over a flat surface. Pre-mixed "brick repair" tubes are convenient for quick fixes, but they can be tricky to colour-match. Always test a small amount first to see how it dries against your existing masonry.
Preparation: The Key to a Lasting Fix
Preparation is where most people go wrong. Before you even touch the filler, you must remove every trace of the old installation. Use your wire brush to scrub away surface rust and loose masonry flakes. If there are plastic rawlplugs still stuck in the holes, pull them out with pliers. Filling over plastic is a mistake; it creates a weak point where the filler will eventually crack and fall out. Once the hole is empty, use your blow-out bulb to puff away the deep dust. A clever pro tip is the "dampen before fill" technique. Lightly mist the hole with water before applying mortar. This stops the dry brick from sucking the moisture out of your filler too quickly, ensuring it bonds perfectly and doesn't crumble.
Contact our nationwide UK team at 0333 220 2436 or [email protected] for expert assistance across the country.
Contact our nationwide UK team at 0333 220 2436 or [email protected] for expert assistance across the country.
Step-by-Step Guide: How to Repair Brickwork Holes
Now that you have the right tools, it is time to get to work. Repairing wall after satellite dish removal is a precise process that requires patience. Follow these five steps to ensure a professional, weather-proof result that lasts for years. We provide this expert service across the whole of the UK, ensuring your home looks its absolute best without the DIY stress.
- Step 1: Complete Extraction. Use pliers or a screwdriver to pull out every remaining plastic wall plug. If a bolt has snapped off, use a drill or a punch to clear it. Leaving metal or plastic behind prevents a proper seal.
- Step 2: Deep Cleaning. Use a narrow wire brush or a blast of compressed air to remove every speck of dust from the cavity. Filler won't stick to a dusty surface.
- Step 3: The Right Mix. Mix your repair mortar or filler until it reaches a "stiff peak" consistency. It should be thick enough to stay on your trowel when turned upside down.
- Step 4: Firm Packing. Use a small tool to push the material right to the back of the hole. Work your way forward to the surface. This prevents air pockets that could trap moisture.
- Step 5: Final Texture. Once the filler is flush, use a brush or sponge to match the surrounding wall. Don't leave it perfectly smooth unless your bricks are.
Filling the Cavity Correctly
Many DIY guides suggest just smearing a little filler over the surface. This is a mistake. Satellite fixings often go 50mm deep into your masonry. A shallow surface fill will eventually crack and fall out as the building moves. You must pack the hole firmly from back to front. For very deep holes, you might experience slight "shrinkage" as the material dries. If this happens, simply apply a second thin layer once the first has set to bring it perfectly flush with the brick face.
Finishing and Texturing
The secret to an invisible repair is in the texture. If you have a rendered wall, use a stiff-bristled brush to "stipple" the wet filler. This mimics the rough look of the surrounding area. For traditional bricks, the "wait and wipe" method works best. Let the mortar sit for about 20 minutes until it's firm but not hard. Then, gently wipe the edges with a damp cloth or sponge. This blends the new repair into the weathered brickwork. If you prefer a completely hassle-free experience, Dish Goodbye handles the entire process with professional precision.
Contact our nationwide UK team at 0333 220 2436 or [email protected] for expert assistance across the country.
Contact our nationwide UK team at 0333 220 2436 or [email protected] for expert assistance across the country.
Aesthetic Matching: Making the Repair Invisible
Matching a repair to a wall that has faced twenty years of British rain and city smog is a real challenge. You aren't just filling a hole; you're matching a history of weathering. When repairing wall after satellite dish removal, the goal is a seamless finish. A bright white patch on a soot-stained red brick wall stands out like a sore thumb. It ruins the clean aesthetic you worked so hard to achieve. For front-facing walls, "close enough" simply won't cut it. You want a repair that disappears entirely so your home looks as if the dish was never there.
Matching Traditional UK Brickwork
Traditional UK masonry varies wildly by region. If you're in London, you're likely looking at yellow stock bricks. In the North, it's often deep reds or even local stone. To get the match right, you need to identify the sand used in the original mortar. Is it red, yellow, or a gritty sharp sand? Here's a secret from the pros: mix a tiny amount of soot or dark masonry pigment into your mortar to mimic years of environmental aging. This prevents the "halo effect" where a new, clean repair makes the surrounding wall look dirty by comparison. You can also use a bit of brick dust from a spare brick to colour the surface of your filler while it is still tacky.
Dealing with Render and Painted Walls
Rendered and painted walls present a different set of problems. Even if you have the original paint tin, the colour on your wall has likely faded due to UV exposure. A fresh dab of paint will look much darker than the rest of the elevation. For the best result, repair the hole first and then consider repainting the entire section of the wall. This ensures the transition between the old render and the new filler is completely hidden. If your home has pebbledash, you'll need to carefully press matching stones into the wet filler to replicate the original texture. It's a fiddly task, but it's the only way to avoid a flat, obvious patch.
If this sounds like a complex headache, let the experts handle the details for you. Book a professional satellite dish removal for a perfect, invisible finish anywhere in the UK. We take the stress out of matching and leave your exterior looking flawless.
Contact our nationwide UK team at 0333 220 2436 or [email protected] for expert assistance across the country.
Contact our nationwide UK team at 0333 220 2436 or [email protected] for expert assistance across the country.
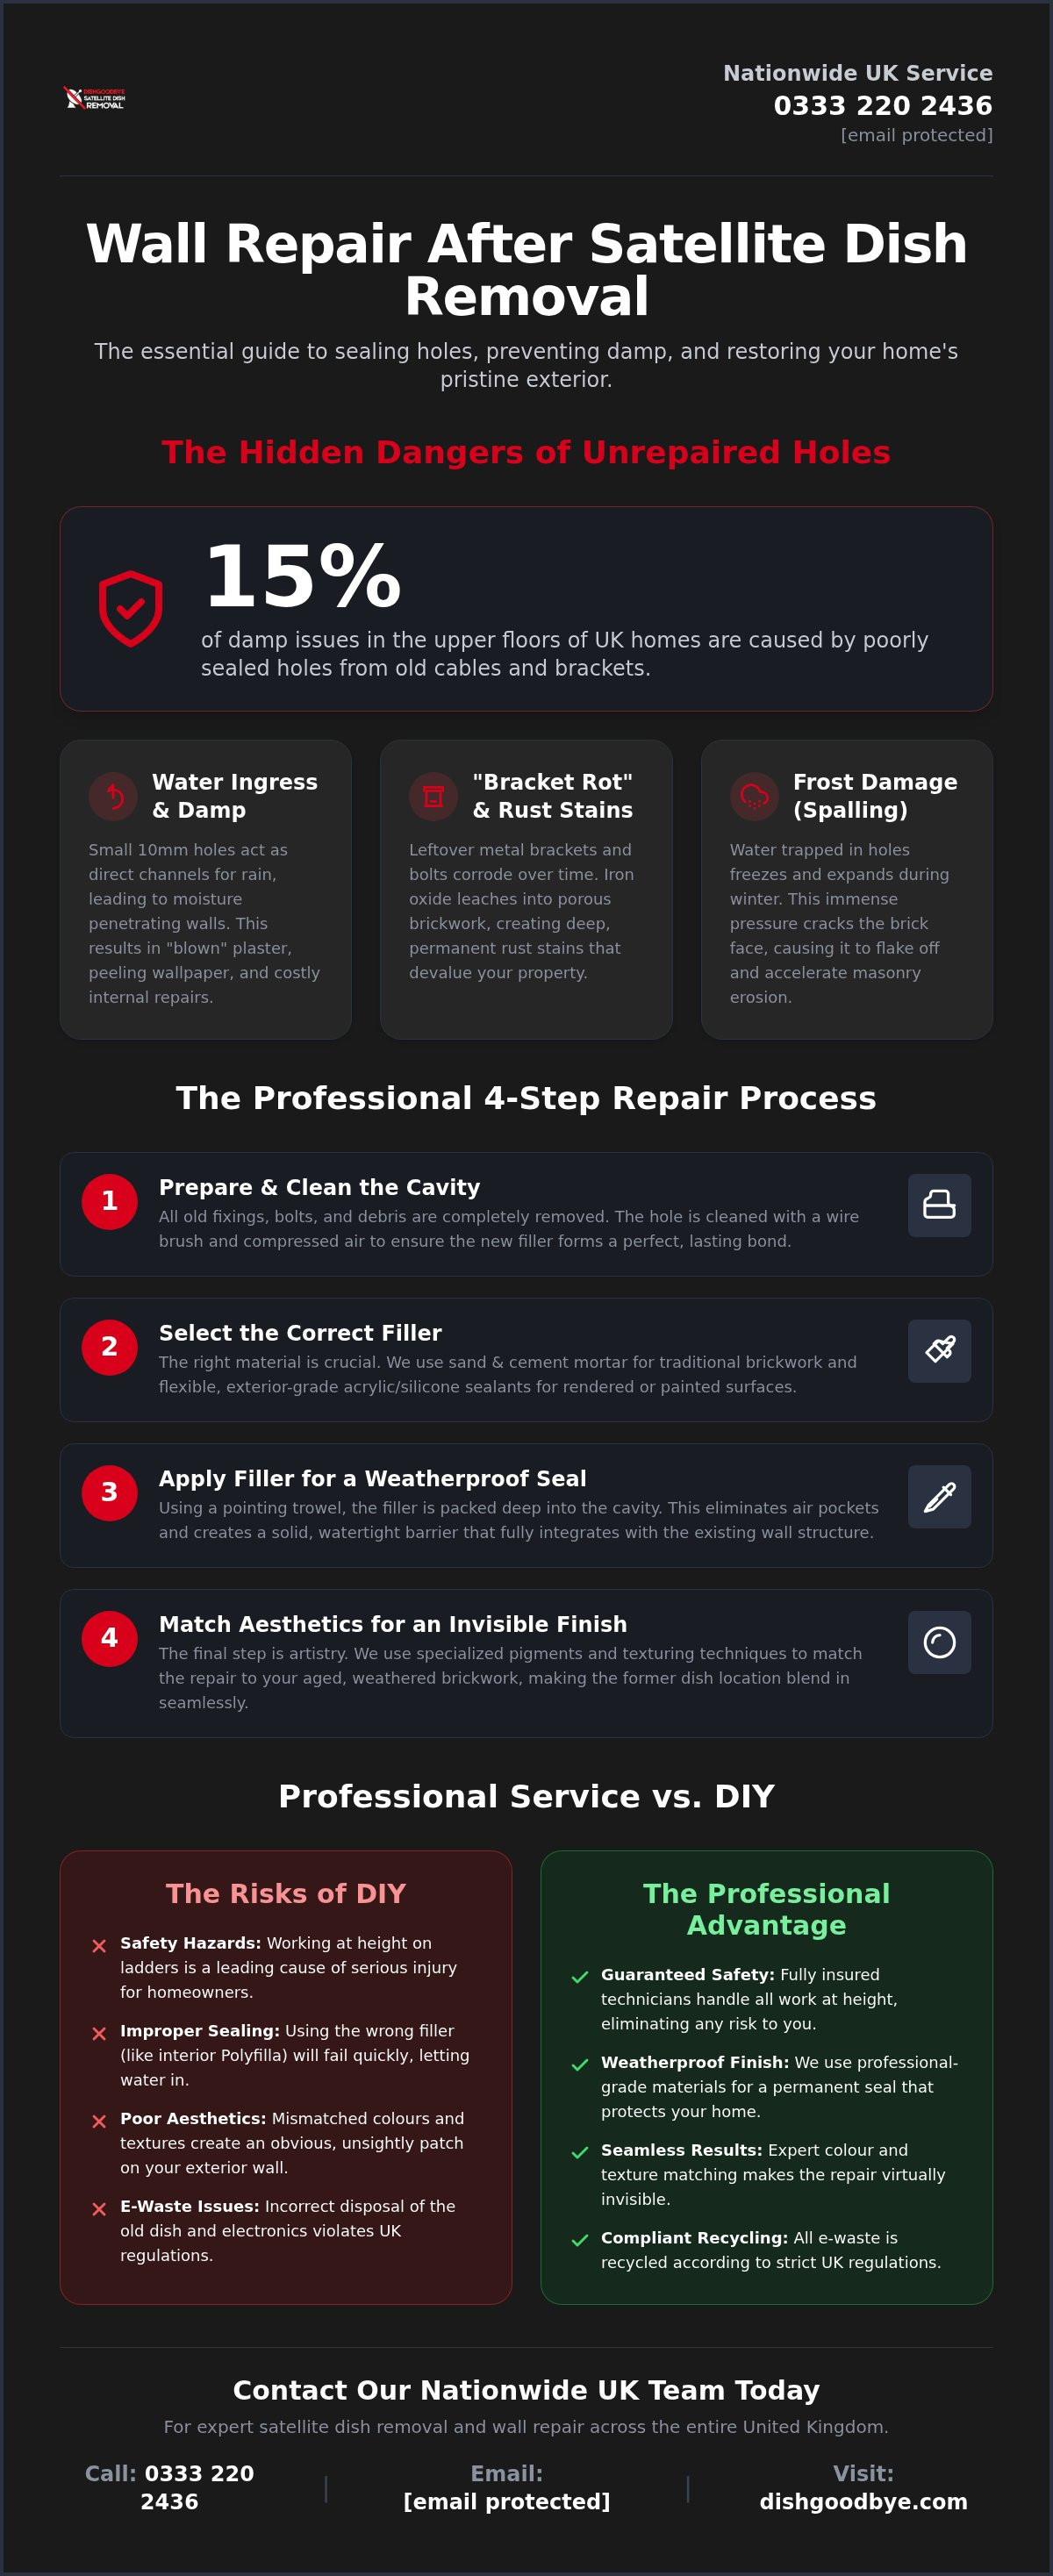
Professional Removal vs. DIY: Safety and Results
Deciding between a DIY weekend project and a professional service usually comes down to two things: safety and the quality of the final finish. While we have outlined the steps for repairing wall after satellite dish removal, the reality of the task is often more complex than it looks on paper. A professional specialist ensures the job is completed in one visit, leaving your home pristine and protected. It is the definitive way to upgrade your property's exterior without the personal risk or the hassle of waste disposal.
The Risks of DIY at Height
Working at height is a major safety concern for any UK homeowner. Balancing on a standard domestic ladder while wrestling with a heavy, rusted metal dish is a recipe for disaster. You need both hands to operate tools safely, yet you often need at least one to steady yourself against the masonry. Specialized safety equipment, including roof ladders and fall-arrest harnesses, is essential for removals near the roof-line or on chimney stacks. Don't risk a serious injury for the sake of removing a redundant piece of tech. Professional teams have the training and the right kit to handle these heights safely and efficiently every single day.
Why a Specialist Service Wins
General builders or local handymen often treat dish removal as a minor afterthought. They might pull the dish down but leave trailing black cables pinned to your white render or snap off rusted bolts deep inside the brickwork. A specialist service like Dish Goodbye provides a total solution that generalists miss. We focus on a complete clean aesthetic. This means we don't just take the dish; we extract every fixing, remove the cabling, and ensure your masonry is professionally sealed and smoothed. It is time to say a final dish-goodbye to those rusty eyesores and the clutter of the past.
There is also the matter of legal disposal. Old satellite equipment is classified as Waste Electrical and Electronic Equipment (WEEE) under UK law. You cannot simply toss a dish into your domestic wheelie bin. Professional services ensure that 100% of the e-waste is transported to approved recycling centres, keeping you compliant with environmental regulations. Another factor to keep in mind is your property value. Exterior maintenance issues accounted for 42% of all UK rental deposit disputes in 2023. Whether you are a tenant moving out or a homeowner preparing to sell, a professional repair is a smart investment. It guarantees your wall is weather-proof and your curb appeal is fully restored. For a hassle-free experience across the whole of the UK, contact us at 0333 220 2436.
Contact our nationwide UK team at 0333 220 2436 or [email protected] for expert assistance across the country.
Contact our nationwide UK team at 0333 220 2436 or [email protected] for expert assistance across the country.
Reclaim Your Home’s Flawless Exterior Today
Restoring your masonry is about more than just a tidy finish. It's your home’s primary defence against the damp and structural spalling caused by redundant, rusted fixings. By following the right preparation steps and matching your specific mortar textures, repairing wall after satellite dish removal becomes a satisfying step toward a modern, clutter-free property. You’ve learned how to pack those cavities from back to front and how to mimic aged brickwork for an invisible result that lasts.
You don't have to face the risks of high-altitude ladder work or the headache of colour-matching aged brickwork alone. Our specialist team provides a nationwide service across the UK, offering expert hole-filling and 100% eco-friendly recycling of all metal and e-waste. We handle everything from the initial extraction to the final aesthetic touch, ensuring your home remains weather-proof and beautiful. Book your professional UK-wide dish removal today and enjoy the instant relief of a clean house front. It's time to let go of the old tech and embrace a brighter look for your home.
Contact our nationwide UK team at 0333 220 2436 or [email protected] for expert assistance across the country.
Contact our nationwide UK team at 0333 220 2436 or [email protected] for expert assistance across the country.
Frequently Asked Questions
Do I really need to fill the holes after removing a satellite dish?
Yes, you must fill these holes to prevent structural damage. Unfilled cavities allow driving rain to bypass your brickwork, leading to internal damp and blown plaster. In fact, an estimated 15% of damp issues in the upper floors of UK homes are caused by poorly sealed exterior holes. Sealing them also prevents water from freezing inside the brick, which causes the face to crack and flake off over time.
What is the best filler for holes in exterior brickwork?
A cement-based masonry filler is the most durable and weather-resistant option for UK homes. Professionals often recommend Toupret Rock Solid Repair Filler because it bonds deeply with the masonry and doesn't shrink. This type of material is designed to withstand the British freeze-thaw cycle, ensuring your repair stays intact for years rather than crumbling away after the first frost.
Can I use interior polyfilla for exterior wall repairs?
No, you should never use interior filler for an outside wall. Interior products are designed for dry environments and will quickly dissolve or crack when exposed to rain and moisture. Using the wrong material is a frequent error when repairing wall after satellite dish removal. It results in a weak seal that fails to protect your home from water ingress, eventually leading to more expensive repairs.
How do I match the mortar colour on an old Victorian house?
Matching old mortar requires identifying the sand type used in the original build, such as red or yellow pit sand. You can mimic the "aged" look of a Victorian property by mixing a tiny amount of soot or dark masonry pigment into your mortar. This prevents the repair from looking like a bright, modern patch. Testing a small amount and letting it dry is the best way to ensure an invisible finish.
Will removing the dish and repairing the wall increase my home value?
Yes, restoring a clean exterior significantly boosts curb appeal and property value. Redundant tech and rust stains are eyesores that suggest a lack of maintenance to potential buyers or landlords. Since exterior maintenance issues accounted for 42% of all UK rental deposit disputes in 2023, a professional repair is a simple way to protect your financial interest and make your property stand out in the market.
Is it safe to remove a satellite dish from a ladder myself?
DIY removal from a ladder is risky and often leads to accidents. Balancing a heavy, rusted dish while trying to unscrew fixings requires more stability than a standard domestic ladder offers. Professional services use specialized safety equipment and harnesses for a reason. Calling in a nationwide specialist prevents the risk of falls and ensures your gutters or roof tiles aren't accidentally damaged during the process.
Does Dish Goodbye fill the holes as part of their removal service?
Yes, we provide a complete service that includes professional hole-filling. Our nationwide UK team extracts all brackets and fixings before sealing the cavities with weather-proof materials. We focus on a clean aesthetic, ensuring your wall is restored to its original state. We also handle the eco-friendly recycling of all metal and e-waste, so you don't have to worry about a thing.
How long does a typical wall repair take to dry before I can paint it?
Most masonry fillers require between 24 and 48 hours to dry completely. This timeframe depends on the depth of the hole and the current humidity levels in your part of the UK. You'll know it's ready when the filler feels rock-hard and the colour has lightened to its final shade. Always ensure the repair is fully cured before applying exterior masonry paint for the best adhesion.
Contact our nationwide UK team at 0333 220 2436 or [email protected] for expert assistance across the country.