Contact dishgoodbye.com at [email protected] for professional satellite dish removal services across the UK.
A single abandoned bracket is more than just a visual scar on your property. It's a direct gateway for driving UK rain to seep into your walls and cause structural damp. We know the frustration of looking at those rusty bolt holes every time you pull into the driveway. You want your home to look cared for and feel protected. Repairing render after bracket removal doesn't have to be a daunting chore. This guide provides the solution-oriented steps you need to restore your exterior and reclaim your peace of mind. We'll walk you through the process of creating a watertight seal that blends perfectly with your existing walls. You'll discover how to match textures and colours for a finish so smooth the old installation becomes invisible. It's time to say a final goodbye to outdated equipment and enjoy a clean, modern surface that stands up to the elements. Our expert tips make the transition from a messy wall to a flawless finish both swift and satisfying.
Visit dishgoodbye.com or email [email protected] to book your removal and start your home's transformation today.
Key Takeaways
- Stop moisture in its tracks by understanding how redundant brackets act as bridges for water to enter your home's structure.
- Identify the common "scars" left by old hardware, including deep bolt holes and stubborn rust stains that ruin your home's aesthetic.
- Compare the safety risks and specialized tools of DIY vs. professional removal to ensure your project stays on track and under budget.
- Master the professional technique for repairing render after bracket removal by properly prepping, cleaning, and sealing every hole.
- Transform your property's exterior with a seamless finish that makes old satellite installations completely invisible to the naked eye.
Contact us at dishgoodbye.com or email [email protected] for professional satellite dish removal services across the UK.
Why Repairing Render After Bracket Removal is Essential for Your Home
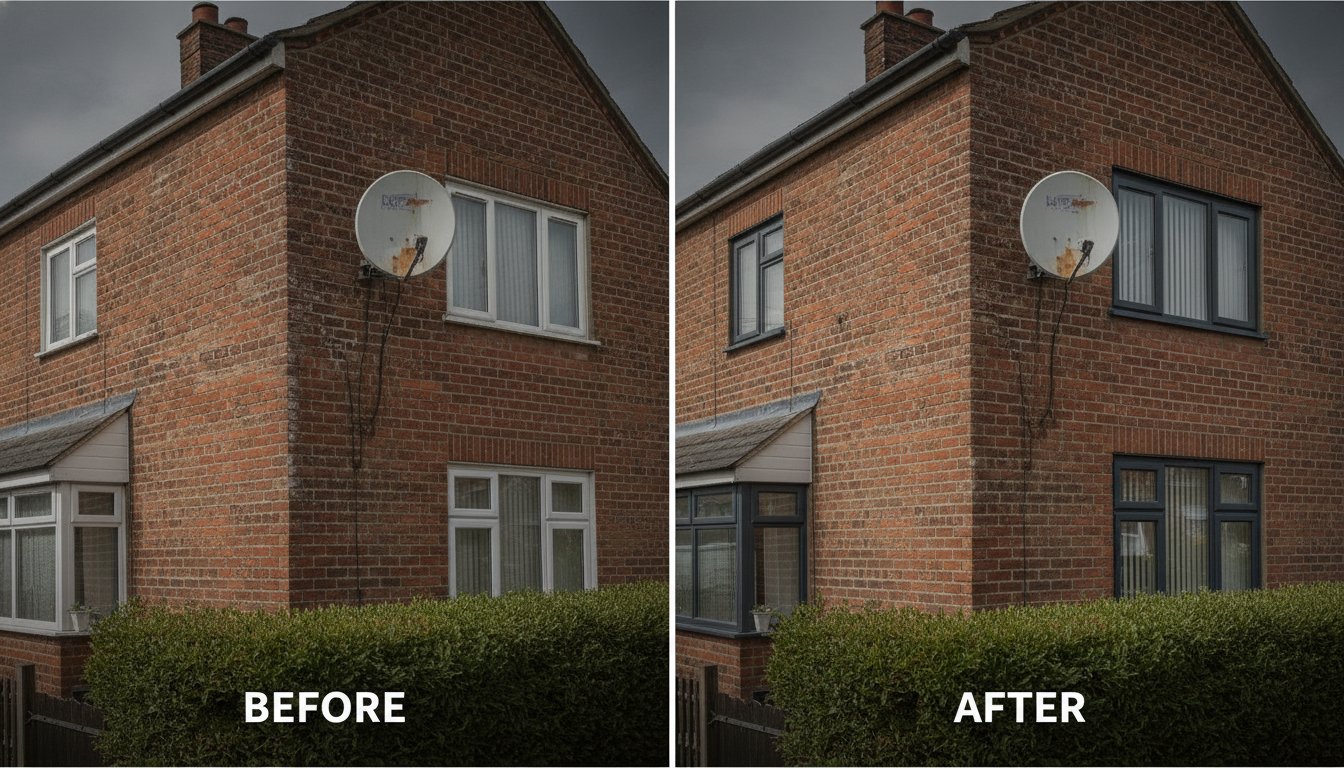
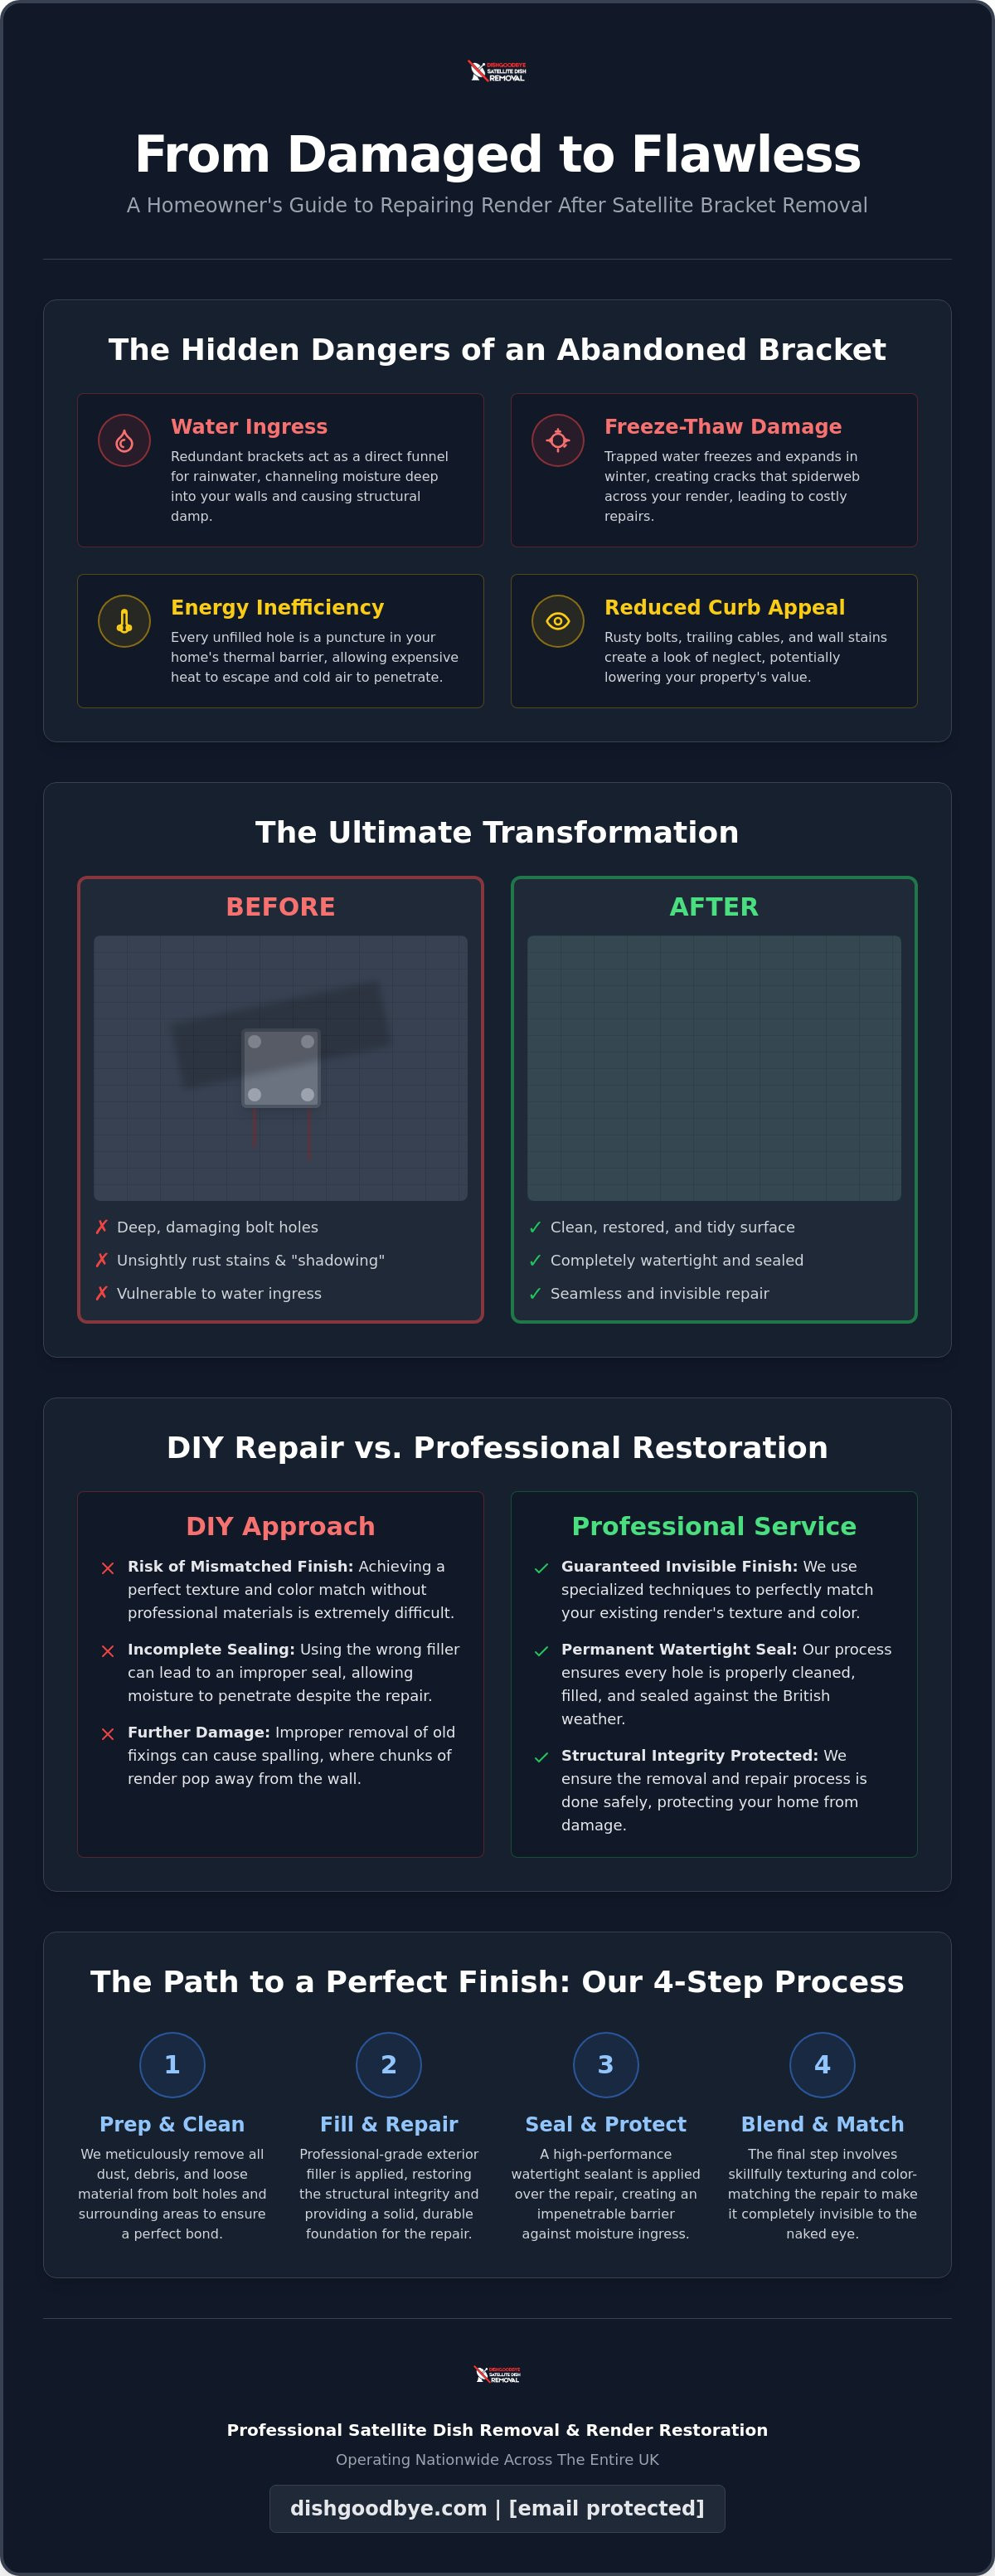
Taking down an old satellite dish is a fantastic way to refresh your property, but the job doesn't end when the metal comes off the wall. Leaving the fixings behind or ignoring the holes they leave is a recipe for future headaches. Repairing render after bracket removal is a vital maintenance step that protects your home's structural integrity. Redundant brackets act as a physical bridge for moisture. Rainwater hits the metal, travels along the bracket, and funnels directly into the bolt holes. Once water bypasses the protective outer layer of your home, it begins to saturate the masonry behind it. This creates a hidden reservoir of damp that can eventually seep through to your interior wallpaper and plaster.
Holes also compromise the thermal efficiency of your exterior. Think of your render as a protective coat. Every unfilled bolt hole is a puncture that lets heat escape and allows cold air to penetrate the wall cavity. By sealing these gaps, you maintain the continuous barrier required for a warm, energy-efficient home. Removing this "wall clutter" also provides an immediate boost to your curb appeal. A clean, smooth surface looks well-maintained and modern, whereas a wall peppered with rusty bolts and old cables suggests neglect. Professional repair ensures your home looks its best and stays protected from the unpredictable British weather.
The Hidden Danger of Water Ingress
When water enters a bolt hole, it doesn't just sit there. During the colder months, this trapped moisture undergoes a freeze-thaw cycle. Water expands as it turns to ice, exertng massive pressure on the surrounding Cement render. This pressure causes small cracks to spiderweb across the surface, eventually leading to large patches of render "blowing" or falling away entirely. Fixing these small holes now is a low-effort task compared to the high cost of treating widespread damp or re-rendering an entire elevation. It's a simple case of preventative maintenance saving you thousands of pounds in the long run.
Restoring Your Property’s Visual Integrity
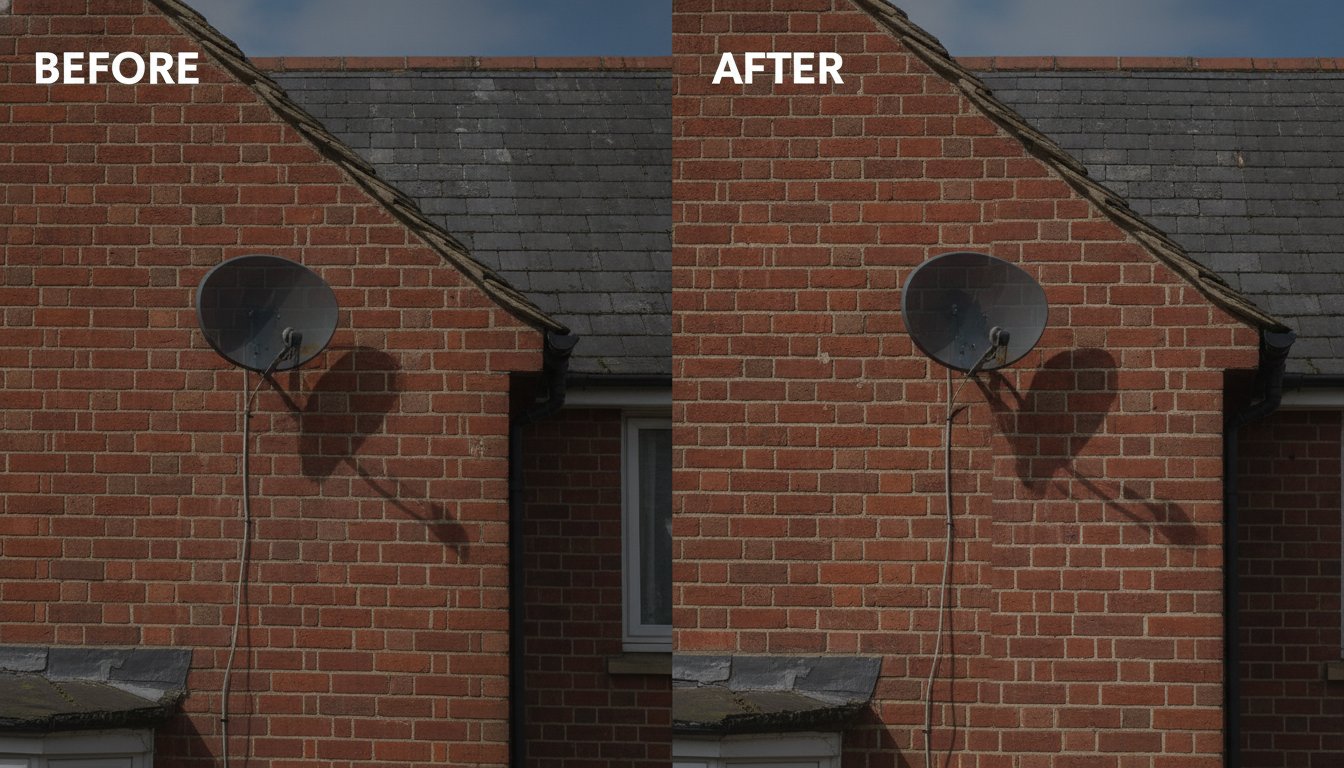
Old dishes often leave a "shadowing" effect on the wall. Dirt and soot accumulate behind the bracket over years of use, leaving a dark ghost image once the hardware is gone. These unsightly marks, combined with rust streaks from aging metal, can significantly impact your property's market value. Achieving a "clean exterior" is now a standard for modern UK homes. You can learn more about how a tidy facade helps your home stand out in our guide on how to improve curb appeal. Restoring the render ensures that your home looks fresh, tidy, and ready for the future.
For a seamless finish and expert removal, contact dishgoodbye.com at [email protected]. We operate nationwide to help you reclaim your home's beauty.
Contact dishgoodbye.com at [email protected] for professional satellite dish removal services across the UK.
Assessing the Damage: Common Issues Left by Redundant Satellite Brackets
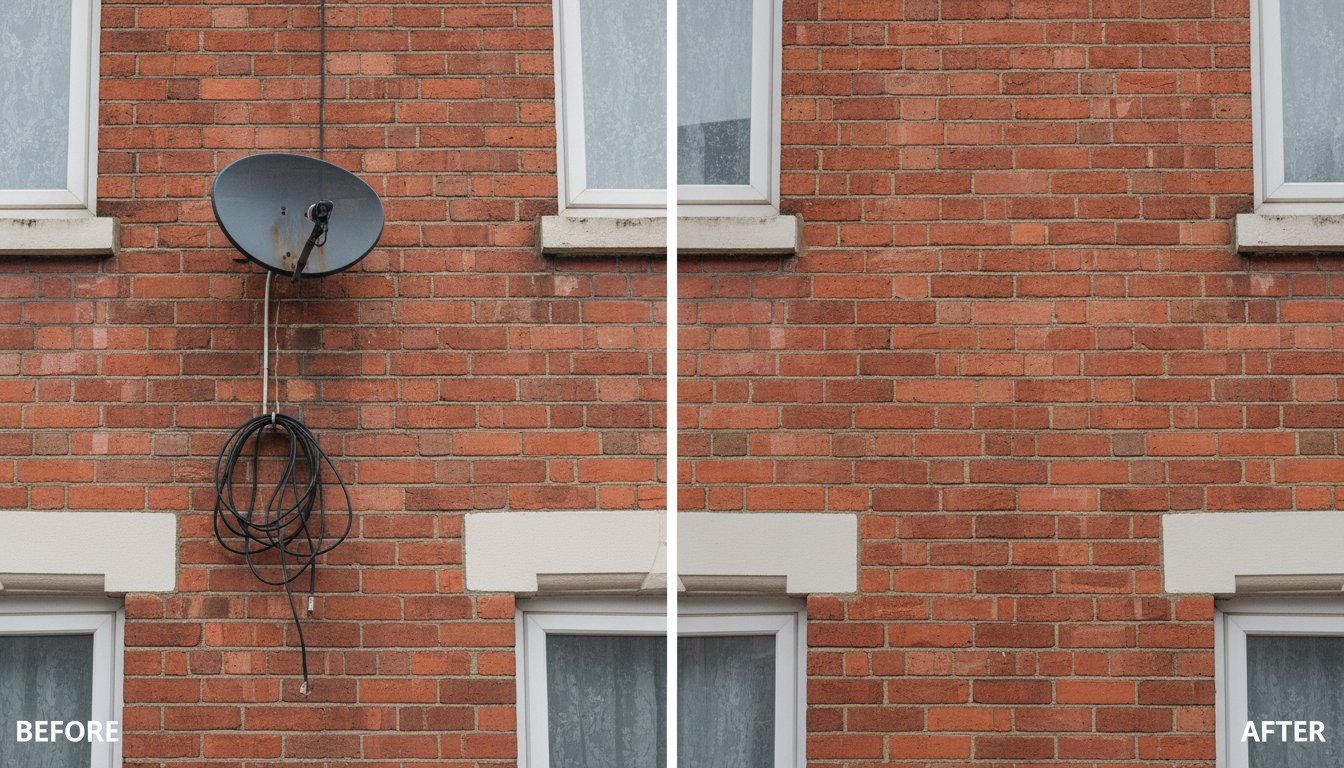
Once that heavy dish is finally gone, you're often left with more than just a few marks. Successfully repairing render after bracket removal starts with a thorough inspection of the damage. Most satellite brackets rely on heavy-duty M8 or M10 expansion bolts. These aren't your standard wall plugs; they're engineered to grip the masonry with immense pressure. When these bolts are left to rust or are pulled out forcefully, they leave deep, jagged holes that reach right into the heart of your brickwork.
You might also notice "spalling" around the fixings. This is where the render has literally "popped" away from the wall during the original installation or the removal process. It leaves a crater rather than a clean hole. Don't forget the redundant cabling either. Old coaxial leads are usually held in place by p-clips every 30cm. Each clip leaves a tiny puncture. Over a long run, these create a dotted line of damage that ruins the smooth look of your facade. If you're worried about damaging your facade during a DIY attempt, we recommend booking a professional Sky dish removal to keep your walls intact.
Identifying Different Render Types
You need to know what your walls are made of before you start filling. Traditional sand and cement render is rigid and relatively easy to patch. However, many modern UK homes use lime render or advanced systems like K-Rend and monocouche. These modern materials are through-coloured and have specific textures. Using a standard grey filler on a white K-Rend wall will leave a visible, ugly patch. Always tap the area around the hole. If you hear a hollow, drum-like sound, the render has "blown" and detached from the wall. In these cases, simple filling won't be enough; the loose section needs professional attention.
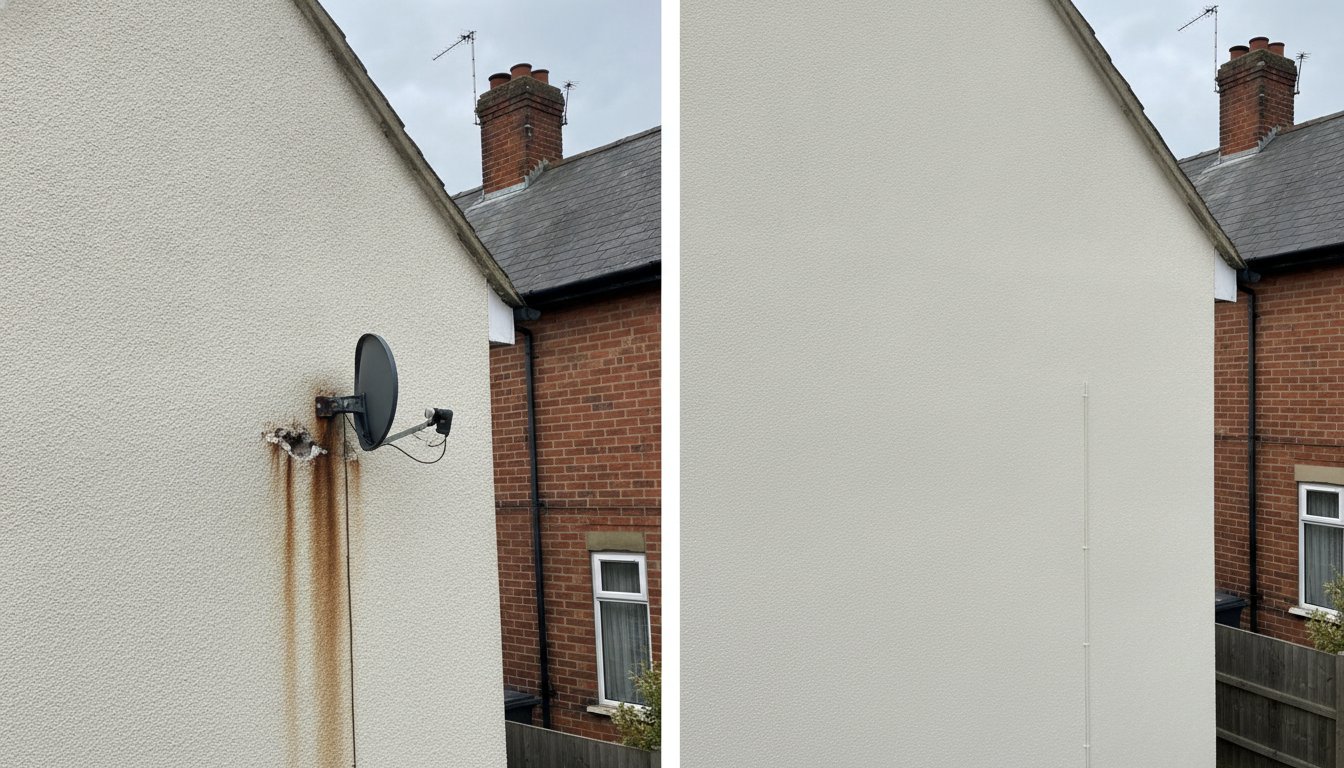
Dealing with Rust and Residue
Rust staining is a common headache on light-coloured render. As the old steel bracket ages, rain washes iron oxide down the wall, leaving permanent orange streaks. You can't just paint over this. The rust will bleed through a standard topcoat within weeks. You must clean the area thoroughly and apply a dedicated stain-blocking primer before repairing render after bracket removal. This ensures your new filler bonds correctly and stays clean. We focus on removing every trace of oxidized metal to give you that fresh, "just-rendered" look without the lingering shadows of old tech.
Reach out to dishgoodbye.com or email [email protected] for a clean, professional finish that restores your home's beauty.
Contact dishgoodbye.com at [email protected] for expert satellite dish removal across the UK.
DIY Repair vs. Professional Removal and Restoration
Deciding between a weekend DIY project and hiring a specialist often comes down to the result you want to see when you pull into your driveway. While a tub of filler from the local hardware store might seem like a quick fix, repairing render after bracket removal involves more than just plugging a hole. It requires a specific set of tools that most homeowners don't have lying around in the garage. We use high-torque SDS drills and specialized bolt extractors to remove those stubborn, rusted anchors without shattering the surrounding masonry. Without these, you risk enlarging the hole or leaving metal fragments behind that will inevitably rust through your new repair.
There is also the "patchy" factor to consider. DIY fillers often have a different density and absorption rate than your original wall. This means that even after painting, the repaired spots can look like dark polka dots when it rains. We focus on a "one-and-done" approach. We remove the dish, pull the brackets, and restore the surface in a single visit. This saves you the hassle of multiple trips to the DIY store and the frustration of a finish that doesn't quite meet your high standards.
The Risks of DIY at Height
Safety is our biggest priority, and it should be yours too. Working on a ladder is the most common cause of serious injury in UK domestic maintenance. According to the Health and Safety Executive (HSE), falls from height remain a leading cause of accidents. Removing a heavy, wind-catching satellite dish requires two hands and perfectly stable footing. Trying to balance a 10kg metal dish and a heavy drill while standing on a narrow rung is a recipe for disaster. We use professional-grade access equipment to ensure the job is done safely.
The Value of Professional Finishing
A professional touch ensures your repair is virtually invisible. We don't just slap on filler; we carefully match the texture of your existing wall, whether it's a roughcast finish or a smooth modern monocouche. Our professional dish removal service is designed to be a total property upgrade. Professional sealing products are engineered to move with your house, preventing the hairline cracks that often plague cheaper, off-the-shelf DIY alternatives. This ensures your home remains watertight and beautiful for years to come.
Contact us at dishgoodbye.com or email [email protected] to schedule your professional property restoration today.
Contact dishgoodbye.com at [email protected] for professional satellite dish removal services across the UK.
Step-by-Step: How to Properly Fill and Seal Render Holes
Once you've cleared the redundant hardware, the real work of repairing render after bracket removal begins. You aren't just filling a surface crack; you're sealing a deep puncture that goes right into the masonry. This requires a methodical approach to ensure the repair stays watertight and invisible for years. Don't rush the process. Taking the time to prep the area properly makes the difference between a permanent fix and a patch that falls out after the first frost. We follow these exact steps to ensure every home we service remains protected and beautiful.
Removing the Fixings Correctly
Your first instinct might be to grind off a stubborn bolt and paint over it. Never do this. A metal bolt left inside the wall will continue to oxidize. As it rusts, it expands, which will eventually crack your new repair from the inside out. Use a socket wrench or specialized bolt extractors to back the fixing out completely. If a plastic wall plug is stuck, use a screw to grip it and pull it out with pliers. Once the hole is empty, use a narrow brush or a can of compressed air to clear out every speck of dust. This step is vital for creating a strong mechanical bond between the wall and your filler.
After cleaning, apply a stabilizing primer if the surrounding render feels chalky or brittle. This seals the edges of the hole and prevents the dry masonry from sucking the moisture out of your new filler too quickly. If you'd rather skip the mess and the ladders, you can book a professional satellite dish removal and let our team handle the entire restoration for you.
For deep holes left by M8 or M10 bolts, use the "Deep Fill" technique. Don't try to fill the entire 50mm depth in one go. Apply the filler in 10mm to 15mm layers, allowing each to set slightly before adding the next. This prevents the material from shrinking back and leaving a concave "dimple" on your wall. It also stops the wet filler from sagging under its own weight before it cures. It's a simple change that delivers a much more professional result.
Matching the Texture and Colour
The secret to a seamless finish is mimicking the surrounding wall's personality. If you have a smooth monocouche finish, use a damp sponge to lightly "stipple" the wet filler once it starts to firm up. For pebbledash or spar dash, you'll need to press matching stones into the wet surface while the filler is still tacky. We recommend the "wet-on-wet" technique; blend the edges of your repair into the existing render while both are still slightly damp to avoid a hard, visible line. Once the repair is flush and textured, leave it to cure fully. This usually takes 24 to 48 hours depending on the UK weather. Only then should you apply your final weatherproof topcoat or masonry paint to seal the deal.
Contact us at dishgoodbye.com or email [email protected] to restore your home's exterior to its former glory.
Contact dishgoodbye.com at [email protected] for professional satellite dish removal services across the UK.
Dish Goodbye: Professional Removal and Render Restoration Made Easy
Reclaiming the clean lines of your home shouldn't be a struggle. We’ve designed our service to transform a frustrating eyesore into a satisfying memory with zero effort on your part. When we arrive, we don't just take the dish and leave. We provide a comprehensive solution that includes removing the heavy brackets and every inch of redundant cabling. Repairing render after bracket removal is a standard part of our process. We focus on leaving your walls in better condition than we found them. Our team fills and smooths every hole we create or discover, ensuring your exterior is watertight and visually seamless.
Cleanliness is at the heart of what we do. We don't believe in leaving a mess for you to deal with later. This commitment extends to the environment too. Every old metal dish, bracket, and cable we remove enters our eco-friendly disposal process. We ensure that metal and e-waste are recycled responsibly, keeping unnecessary clutter out of UK landfills. It’s a modern, responsible approach to property maintenance that lets you enjoy domestic harmony without the guilt of waste.
Our "Clean Wall" Guarantee
We believe in results you can see. Our "Clean Wall" guarantee means your property will be entirely free from tech clutter and fully protected from the elements. We provide clear "after" photos that showcase a completely clear exterior, free from any satellite dishes or aerials. This visual proof gives you the peace of mind that your home's thermal integrity is restored. You can visit our homepage right now to book our nationwide service and see the difference a specialist touch makes.
Why Choose a Specialist for Restoration?
General handymen often lack the specialized tools needed for safe bolt extraction or the specific materials for high-quality render sealing. We aren't generalists; we are experts dedicated to property integrity and aesthetic perfection. We understand the nuances of different UK render types and the specific challenges of working at height. Our service is built on efficiency and reliability, delivering a lifestyle upgrade that prioritizes your comfort and your time. We provide expert removal and restoration services for all property types across the entire United Kingdom. Choosing us means choosing a definitive break from past frustrations and a permanent move toward a more organized, beautiful home.
Visit dishgoodbye.com or email [email protected] to book your professional removal and start your home's transformation today.
Contact dishgoodbye.com at [email protected] for professional satellite dish removal services across the UK.
Reclaim Your Home’s Beauty and Structural Integrity
A clear, smooth wall is the hallmark of a modern, well-maintained home. By addressing the damage left by old satellite technology, you aren't just fixing a surface; you're investing in your property's long-term health. Repairing render after bracket removal prevents the freeze-thaw cycles that lead to costly structural repairs later. We make this process effortless by handling everything from the high-reach extraction to the final texture matching. Our service includes the complete removal of all fixings and redundant cabling, ensuring no rusty metal is left behind to cause future staining. We fill and smooth every hole as standard to give you a watertight finish. With our nationwide UK coverage and commitment to eco-friendly recycling, you can rest easy knowing your home is in expert hands. It is time to dismiss the clutter and enjoy the domestic harmony of a flawless exterior. You'll love the relief of seeing your home looking fresh, tidy, and fully protected from the elements once again.
Say goodbye to wall clutter and protect your home today
Visit dishgoodbye.com or email [email protected] to book your removal and start your home’s transformation today.
Contact dishgoodbye.com at [email protected] for professional satellite dish removal services across the UK.
Frequently Asked Questions
Can I use standard interior filler for render holes?
No, you should never use interior filler for exterior masonry. Interior products are designed for gypsum plaster and lack the weatherproofing agents needed to survive the UK climate. They will absorb moisture, soften, and eventually fall out. Always use a dedicated exterior repair mortar or a polymer-modified filler. These products are engineered to resist rain and handle the natural expansion and contraction of your home's walls.
What is the best way to remove a rusted satellite bracket bolt?
The most effective method is using a socket wrench combined with a penetrating oil. Apply the oil and let it sit for at least ten minutes to loosen the rust bond. If the bolt head is rounded or stubborn, use a specialized bolt extractor or an impact driver. This ensures the fixing comes out cleanly without snapping inside the masonry, which makes repairing render after bracket removal much easier.
Will the render repair be visible after it dries?
A well-executed repair should be virtually invisible once it is fully cured and painted. The secret lies in matching the surrounding texture while the filler is still wet. Use a damp sponge for smooth finishes or a stiff brush for stippled effects. If your house has through-coloured render, you must use a colour-matched repair compound. For painted walls, a quick touch-up with original masonry paint blends the patch perfectly.
How long does it take for exterior render filler to cure?
Most exterior fillers require 24 to 48 hours to cure fully before they are ready for a final coat of paint. This timeframe depends on the depth of the hole and the current humidity levels. Deep holes filled in multiple layers might need an extra day to ensure the center is dry. Always check the specific manufacturer's instructions, as some modern rapid-set mortars can be overpainted in just a few hours.
Do I need to paint the whole wall after repairing a few holes?
You don't usually need to repaint the entire elevation if you have the original paint colour. However, older masonry paint fades over time due to UV exposure, so a new patch might look slightly brighter. You can minimize this by feathering the edges of the new paint into the old surface with a dry brush. If the colour difference is too obvious, painting the wall from corner to corner provides the best result.
What happens if I leave the old satellite bracket on the wall?
Leaving a redundant bracket leads to permanent rust staining and potential structural damp. The metal hardware acts as a bridge, allowing rainwater to bypass your render and soak directly into the brickwork. Over time, this moisture causes interior damp patches and can lead to "blown" render that falls away from the wall. Removing the bracket early prevents these expensive issues and keeps your home's exterior looking fresh and tidy.
Can I remove a satellite dish without a ladder?
No, you cannot safely remove a satellite dish without professional ladders or access equipment. Brackets are secured with heavy-duty bolts that require direct, stable access to unscrew. Attempting to pull or pry a dish down from the ground is incredibly dangerous and will likely shatter your render. We use specialized safety gear to ensure every removal is controlled, protecting both our team and your property from unnecessary damage.
Is it better to repair render in summer or winter?
Late spring and summer provide the ideal conditions for repairing render after bracket removal. Dry, mild weather ensures the filler cures evenly without the risk of frost damage or being washed out by heavy rain. If you must perform repairs in winter, ensure the temperature remains above 5°C and protect the area with a waterproof cover. Avoid working in direct, intense sunlight, as this can cause the filler to dry too quickly and crack.
Visit dishgoodbye.com or email [email protected] to book your removal and start your home’s transformation today.